All I have gotten in the mail recently was a census reminder, some Burger King coupons, and a couple of bills. Sure, I’ve gotten some some fun Amazon goodies delivered to my door, but there is something really special about receiving a letter or a card in the mailbox. And especially during this time of social distancing, we aren’t seeing folks we like as much. Whether it is a grandparent or your favorite yoga instructor, follow along and make a pop up card to send. This can also be adapted to create a pop-up book by simply gluing multiple ‘cards’ together.
In the picture below is a paper sculpture by the artist Red Grooms. Let’s take a moment and look and think about what we see in the picture. Looking at photo of art is always different than looking at it in person, but I we can still see a number of details. When we look at piece of art, we are essentially looking for clues, right? How it was made, what it was made of, what kind of colors were used, and so on can all tell us about what the art means, and about the artist as well.
IMAGE: Red (Charles Rogers) Grooms (American, b. 1937), Extra! Extra! Read All About It, 2003, color lithographic cutout construction in Plexiglass case, Courtesy of Karen and Jerry Ceppos
Some of you might have observed that the artwork is not flat—That we might call it a sculpture. Red Grooms makes picto-sculptural art and while he uses multiple media, this artwork is made from paper with pictures printed on the surface. When we say it’s a picto-sculptural artwork it means that there are pictures and it’s a sculpture. Sculpture is an art that is three dimensional—that we can see or experience multiple sides.
We are three dimensional—how many other things can you think of that are three dimensional?
When we look at the artwork, there are details to be seen on multiple sides—the sides of the newspaper stand, the roof, but we can also see into the stand, which means it has depth. Let’s look at this print by Joseph Nash (pictured below).
IMAGE: Joseph Nash (English,1808-1878), Mansions of England: Gallery over the Hall, Knole Kent, 1840, printed color lithograph on paper, Anonymous Donor's Purchase Fund, LSU MOA 63.5.7
When we look at the print, there seems to be a family playing and sitting in a room. However the lady in the chair is much bigger than everyone else—especially those in the back! Is she a giant? Or is something else going on?
Try it out with your family—have everyone space out in the yard or down the sidewalk—What happens to the person furthest away? Or look down the street—is the house or car at the end of the street really small? People and things look smaller further away because of distance—we aren’t right next to each other.
When we look at this print, we can split it up into three sections:
Foreground— What is in the front of the picture or closest to the viewer
Midground—What is in the middle
Background—What is in the back of the painting and the furthest away from the viewer.
Can you identify what is in the foreground, midground and background?
Now that we have talked a little about sculpture and know the difference between the foreground and background, let’s make some three dimensional art similar to the work of Red Grooms.
Supplies:
Card Stock or other heavy-weight paper
Colorful construction paper
White Glue
Scissors
Crayons
Envelope
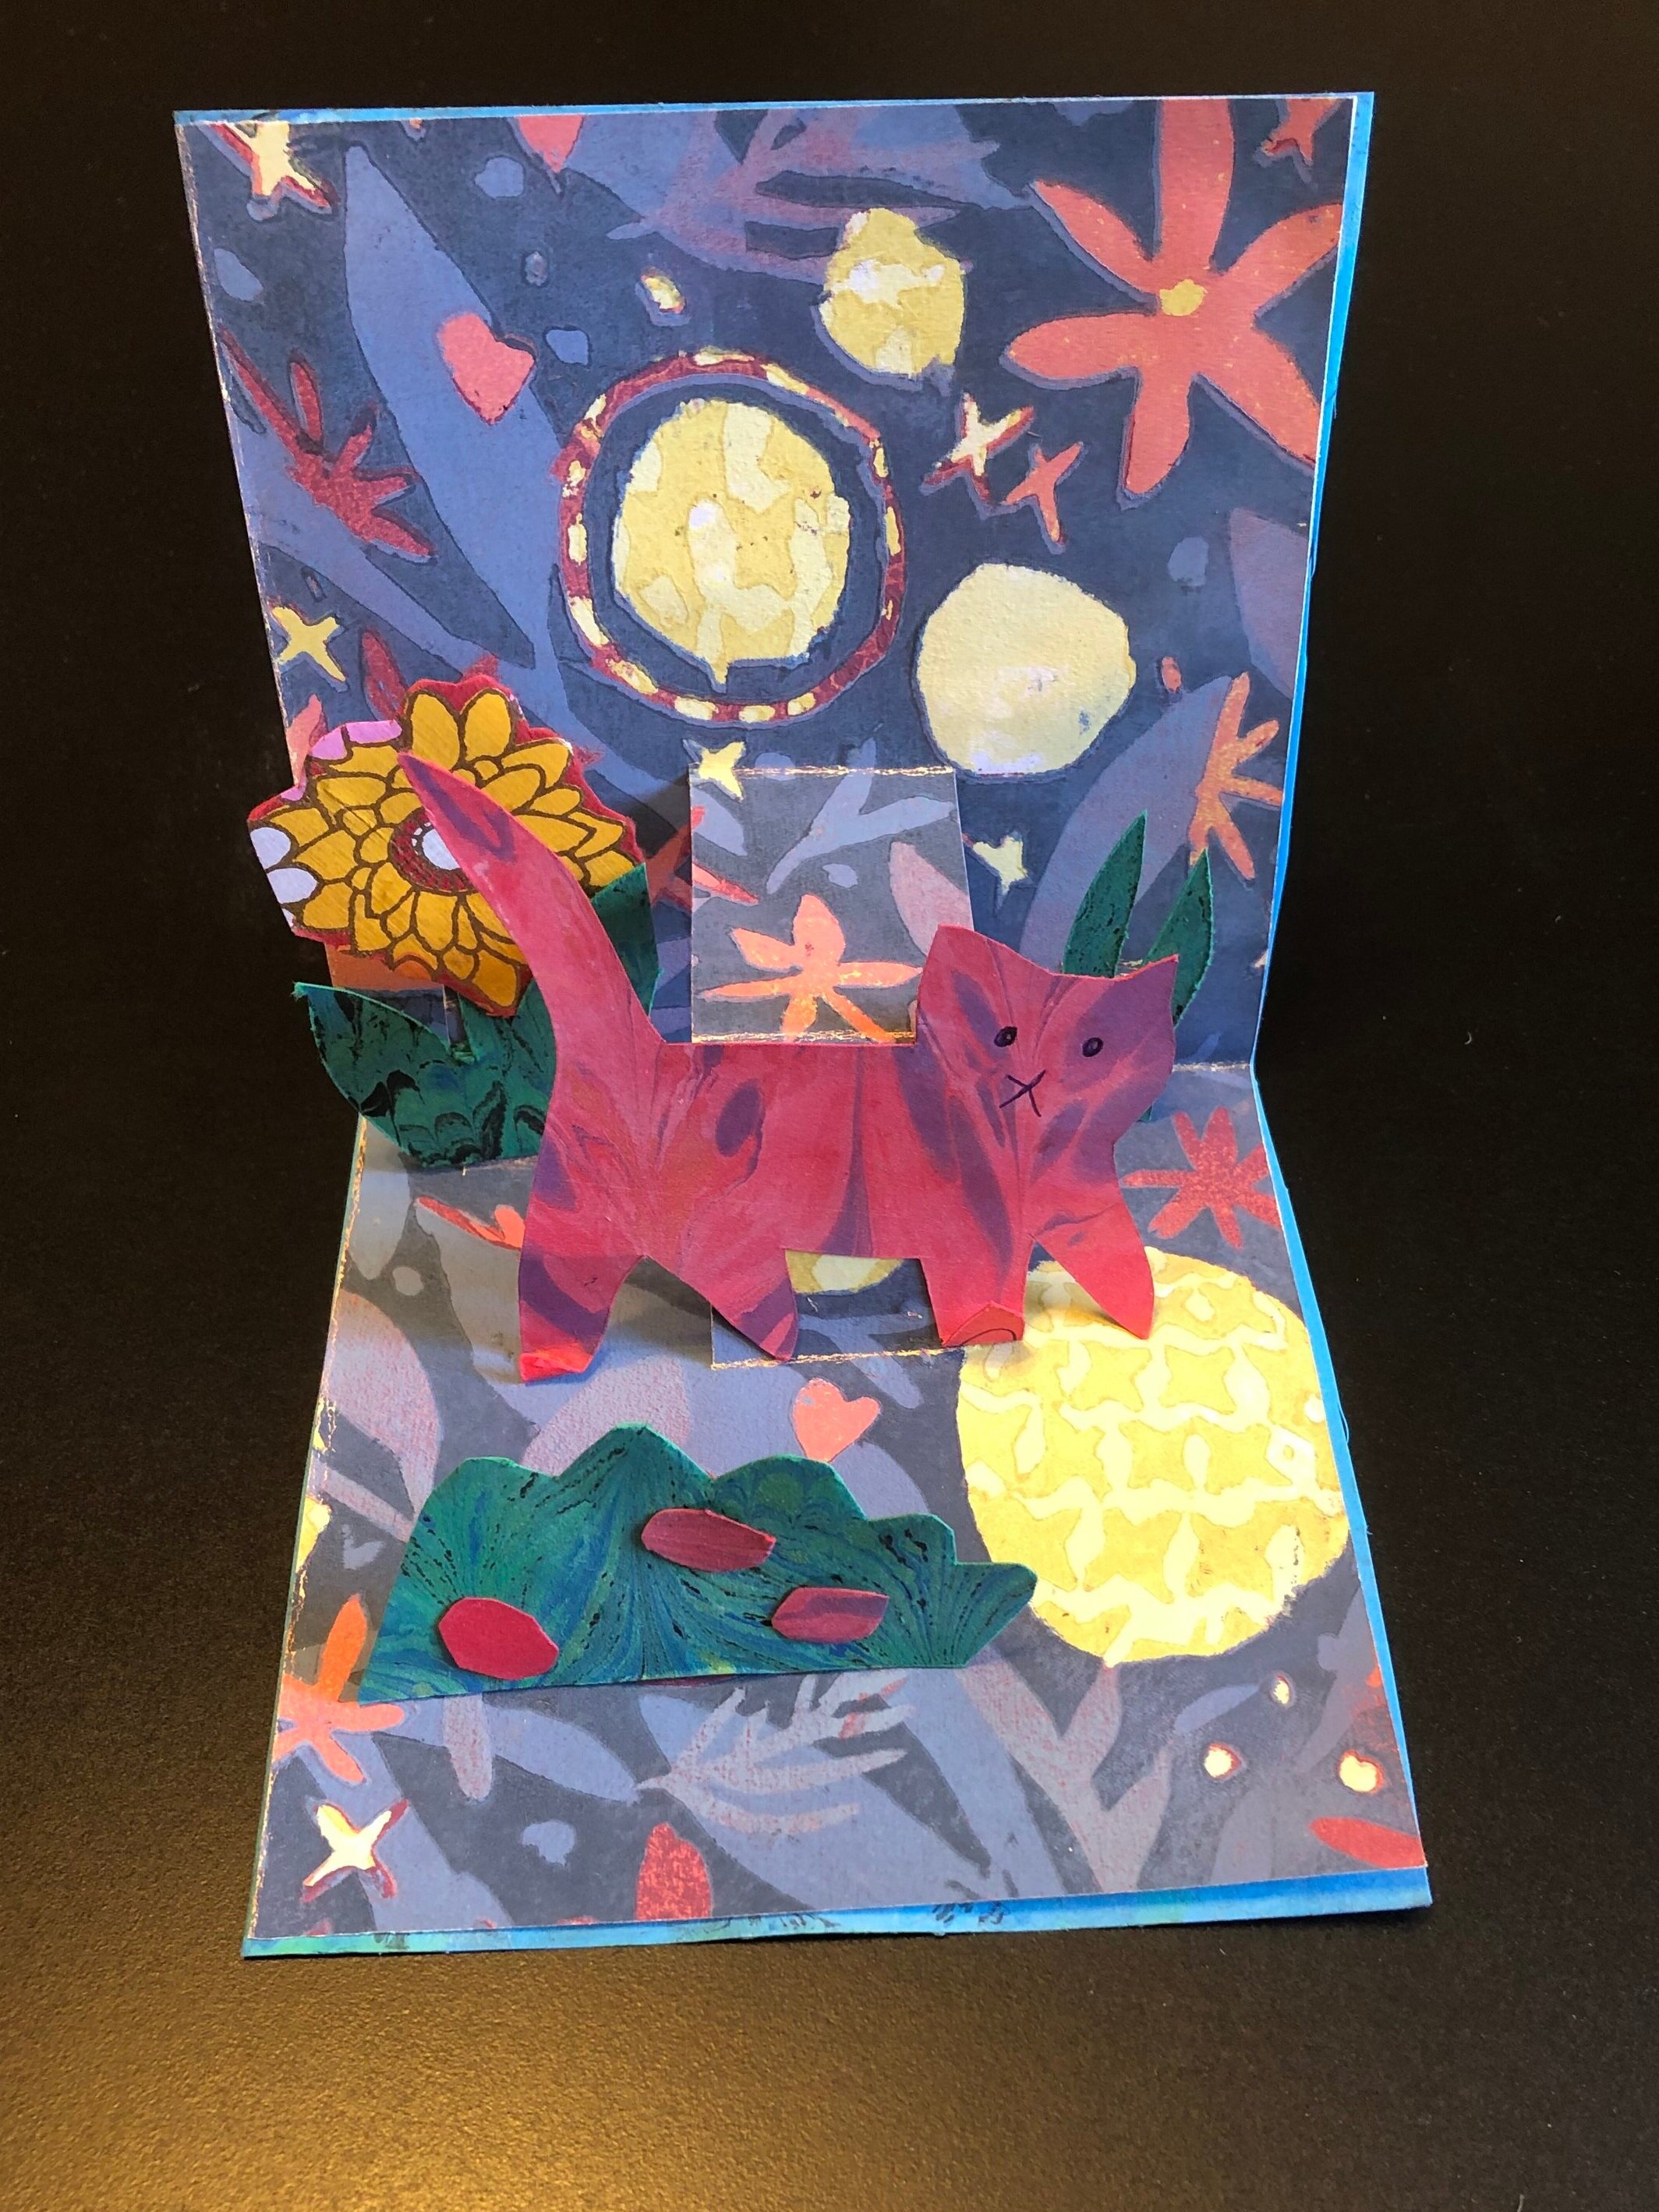
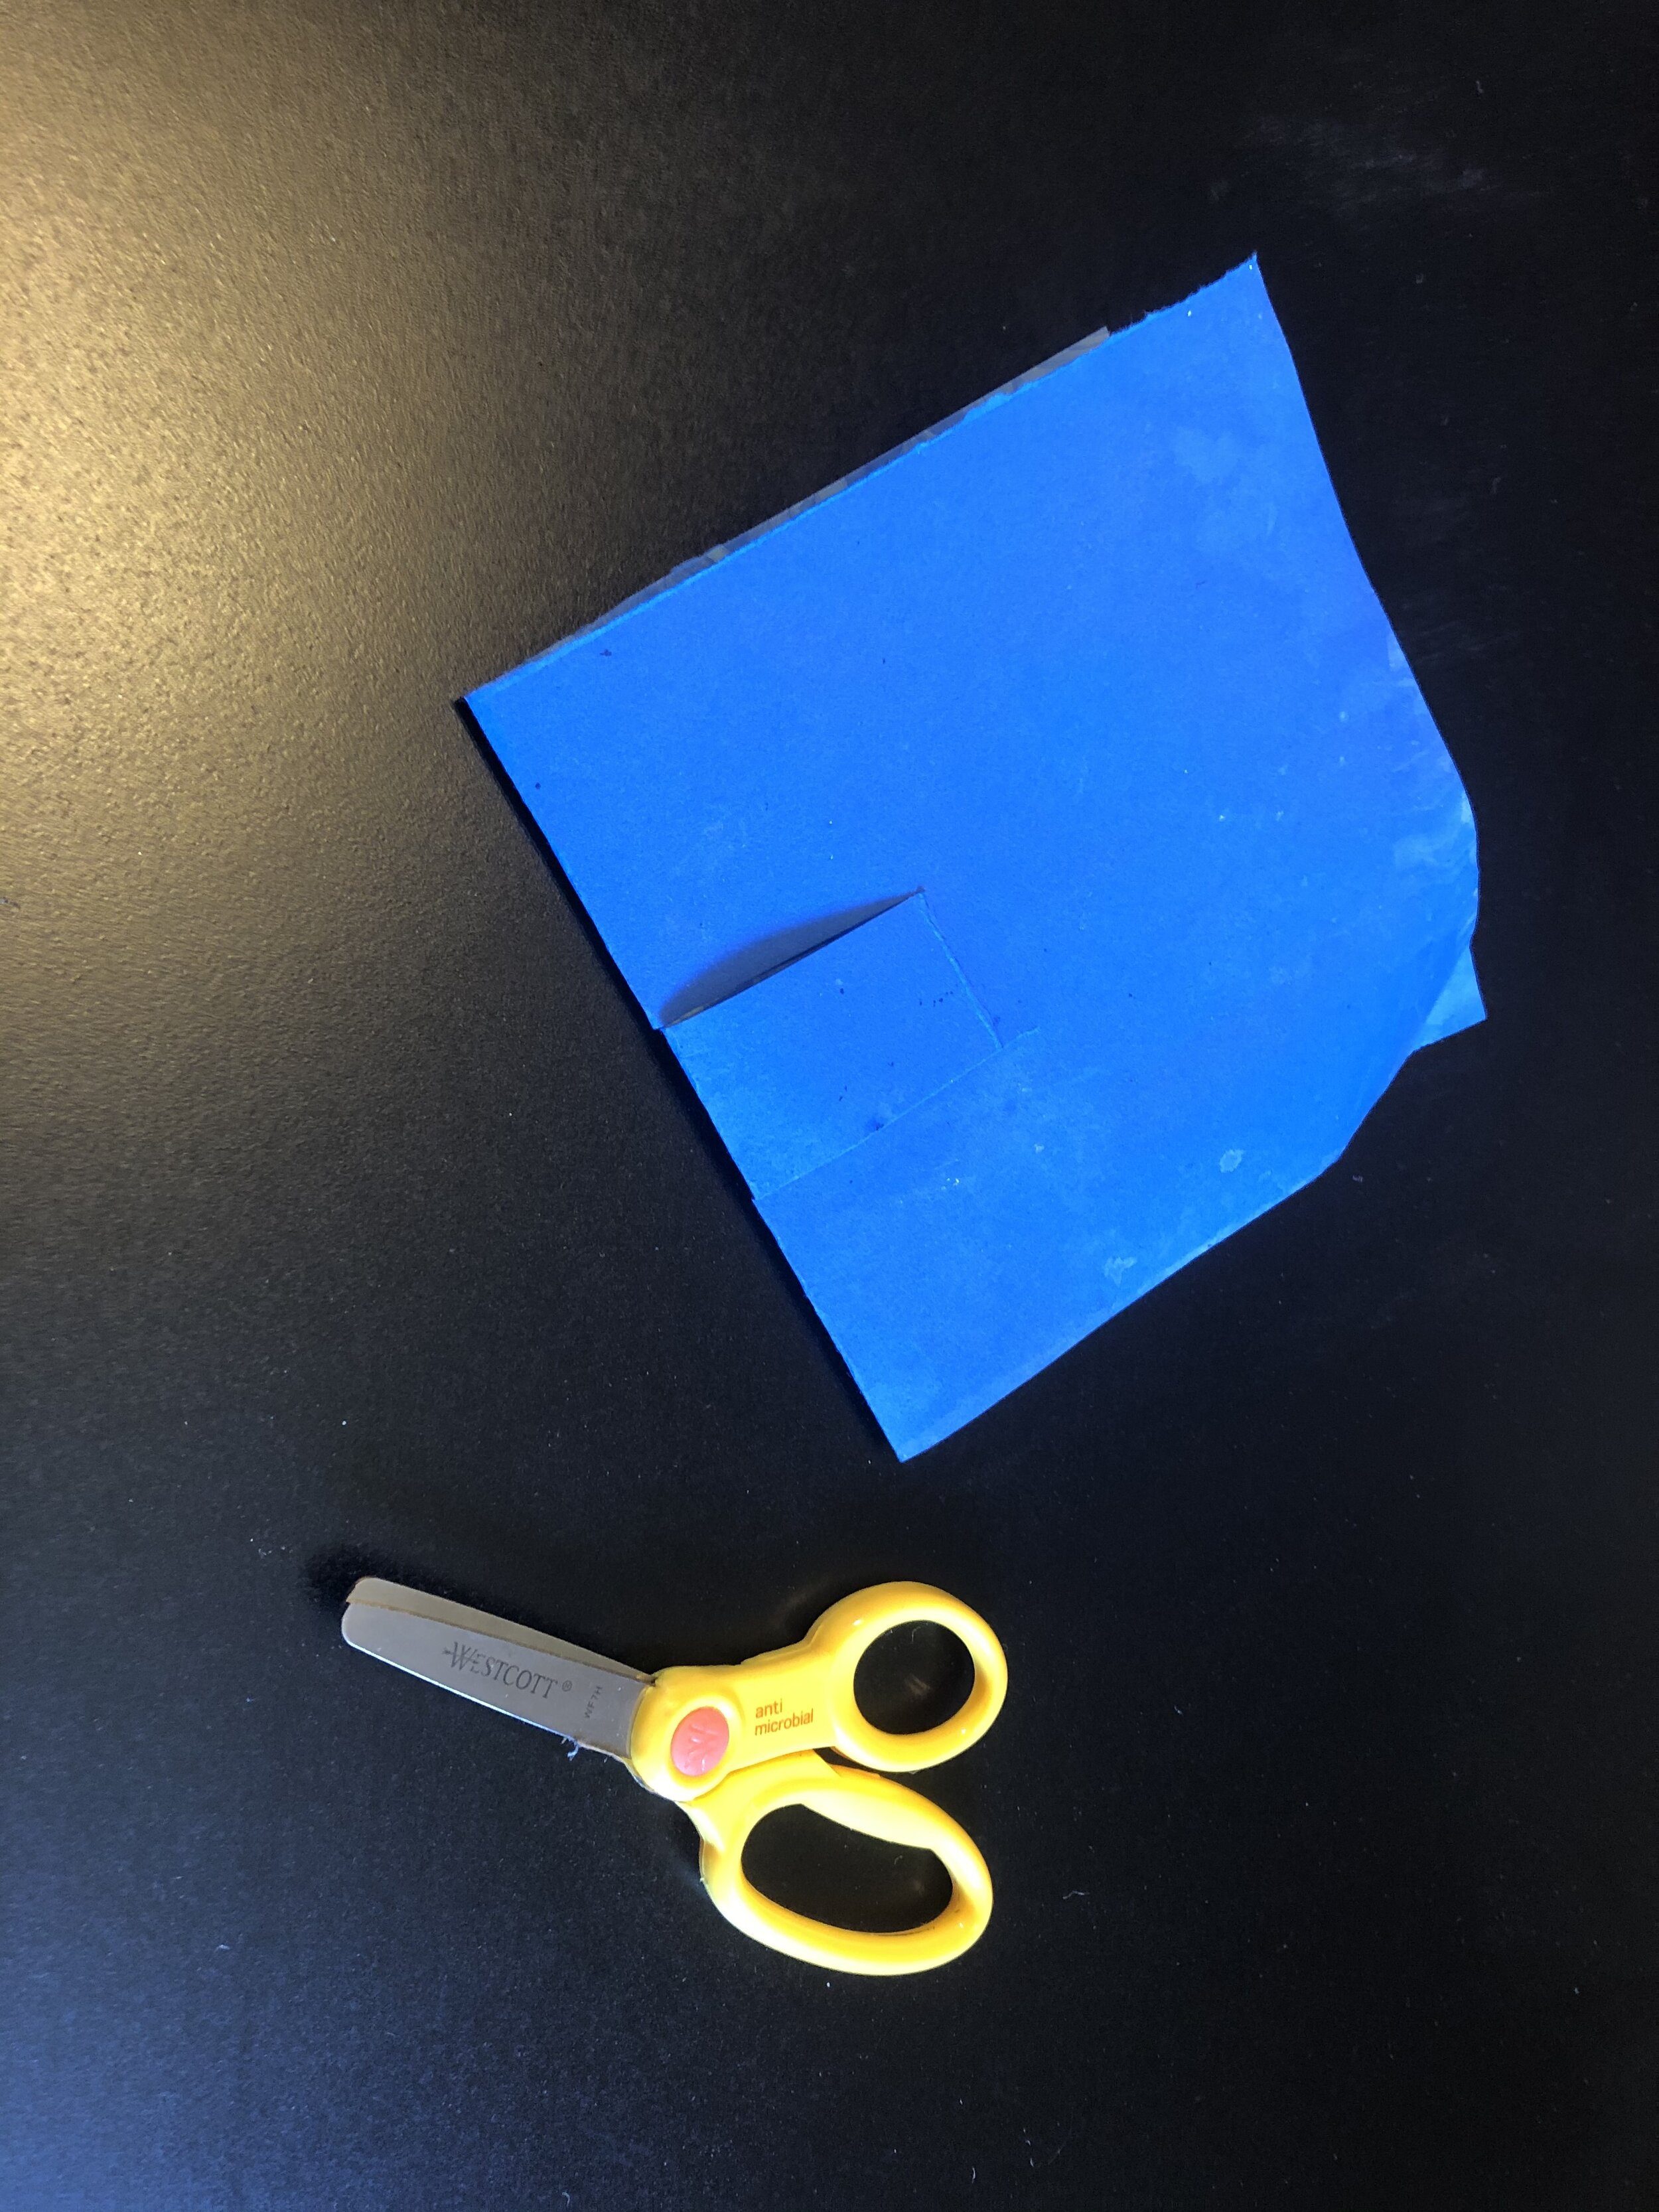
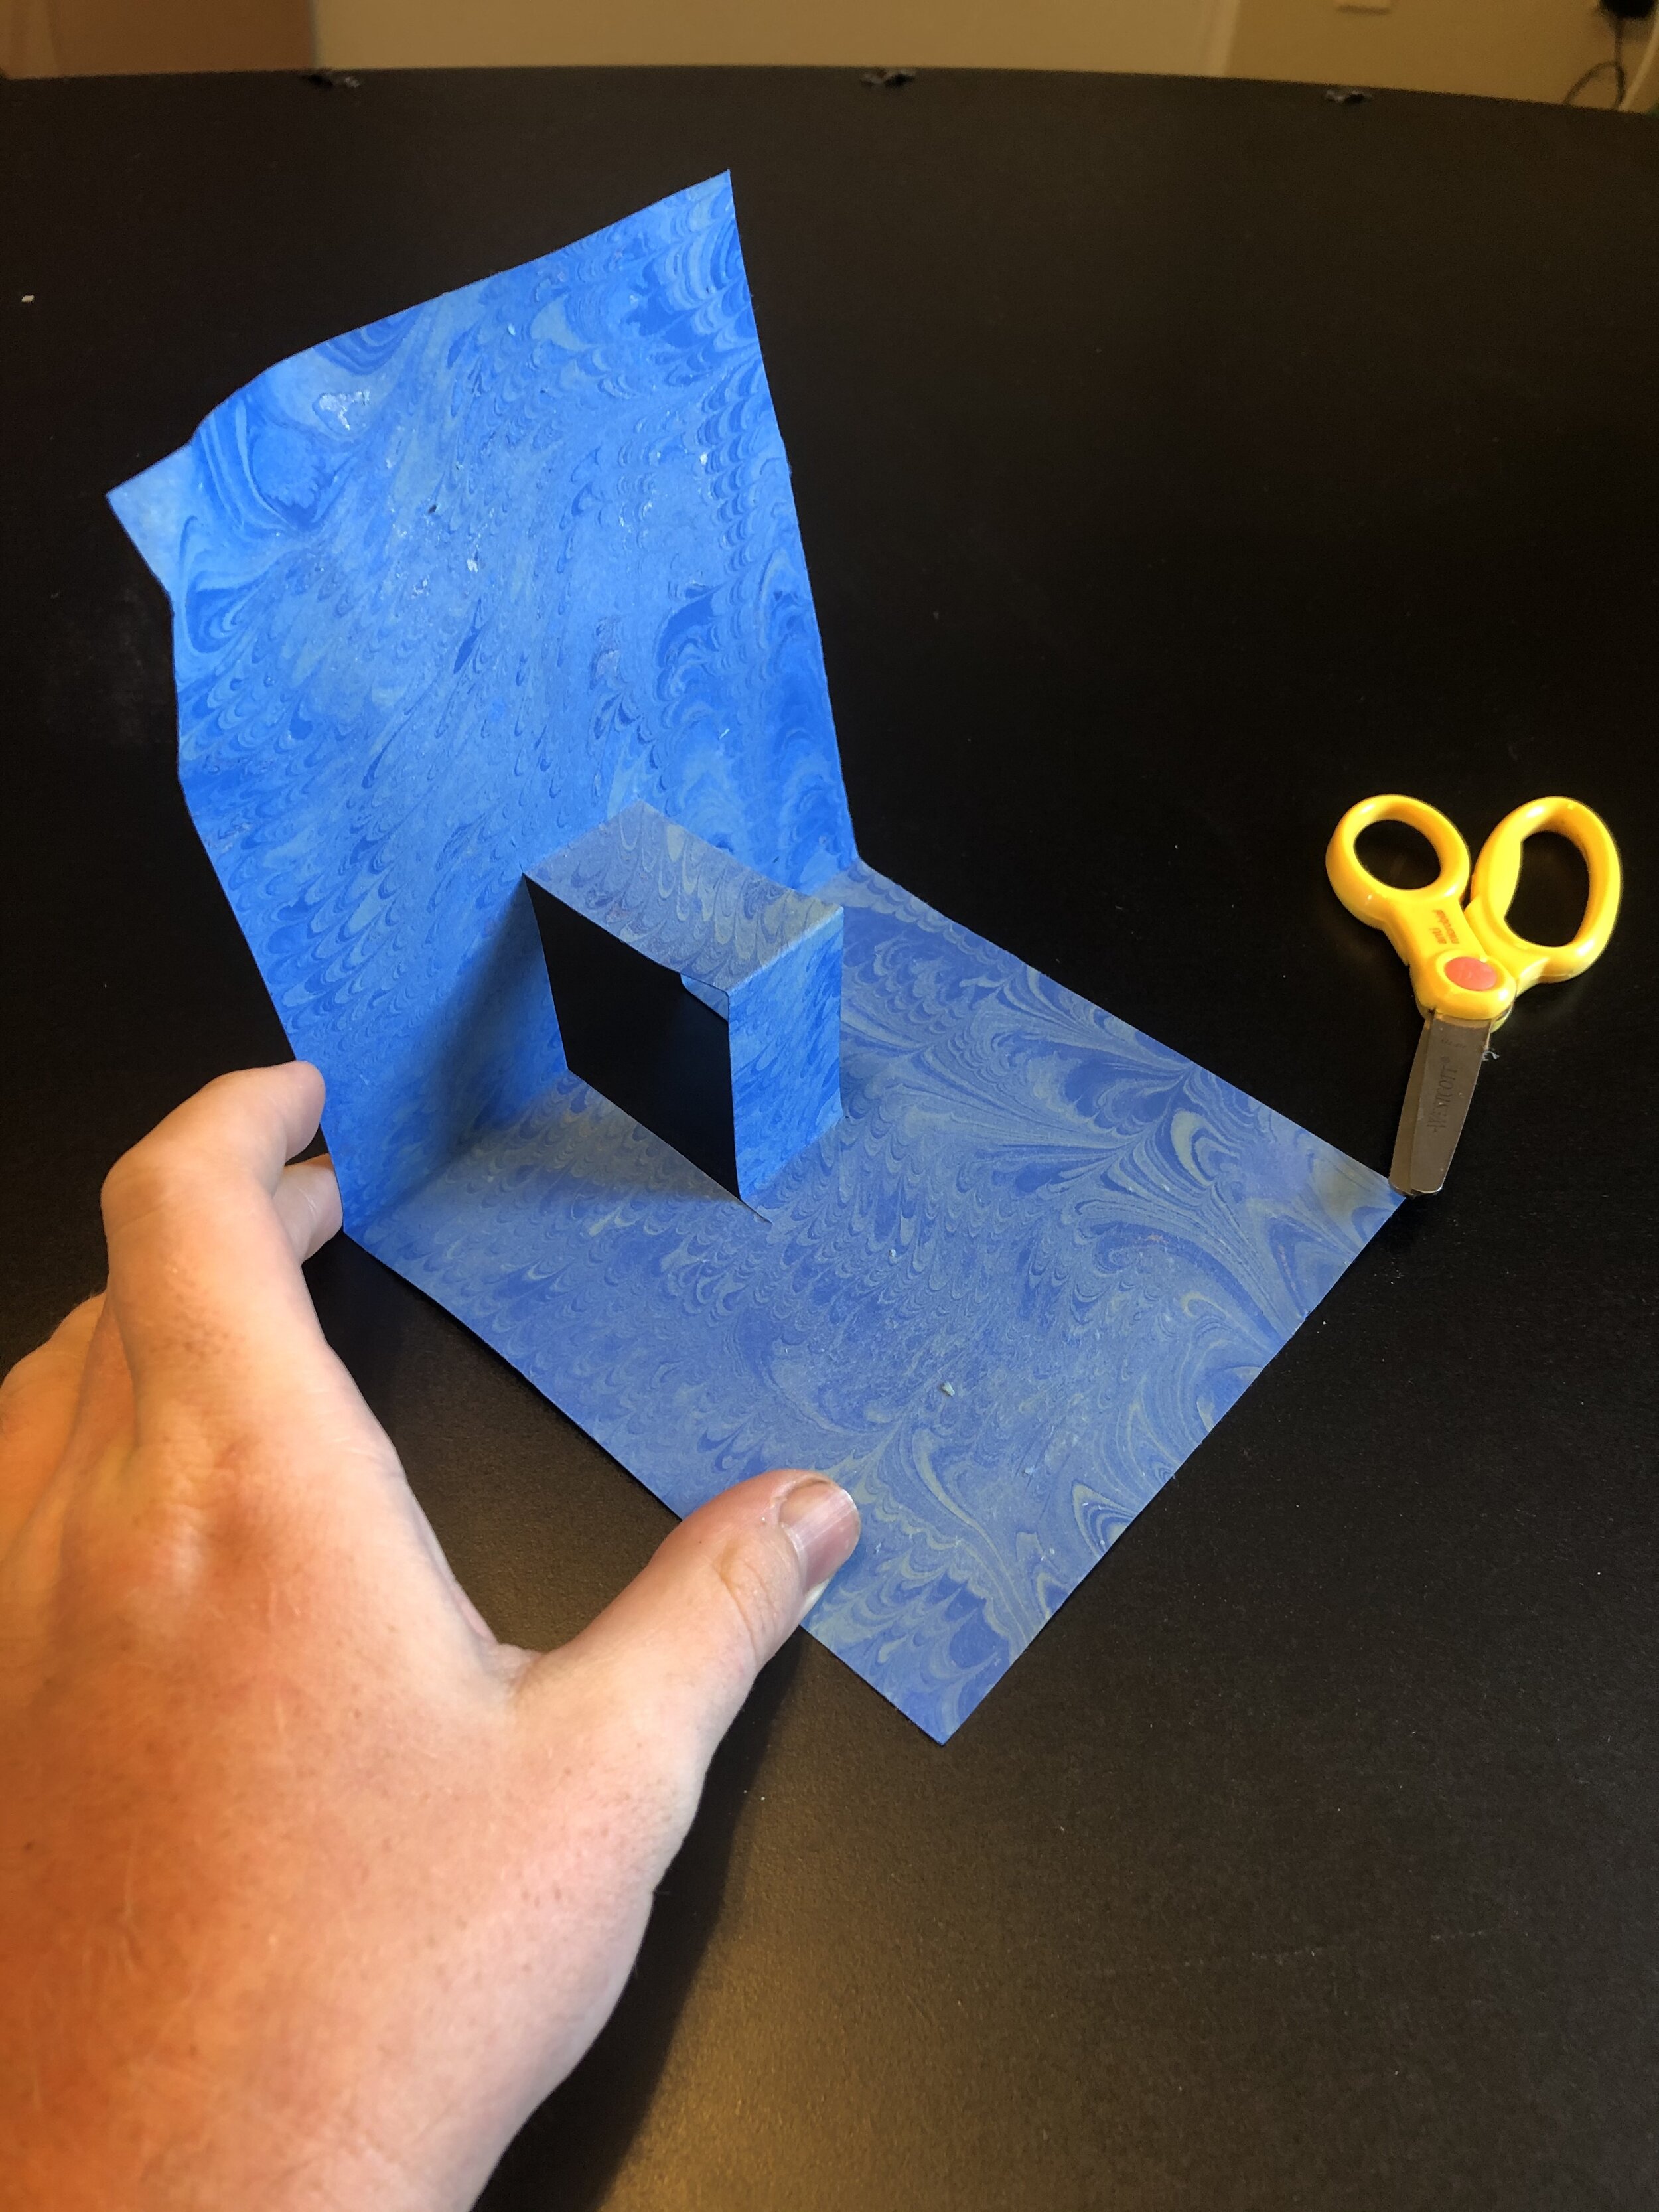
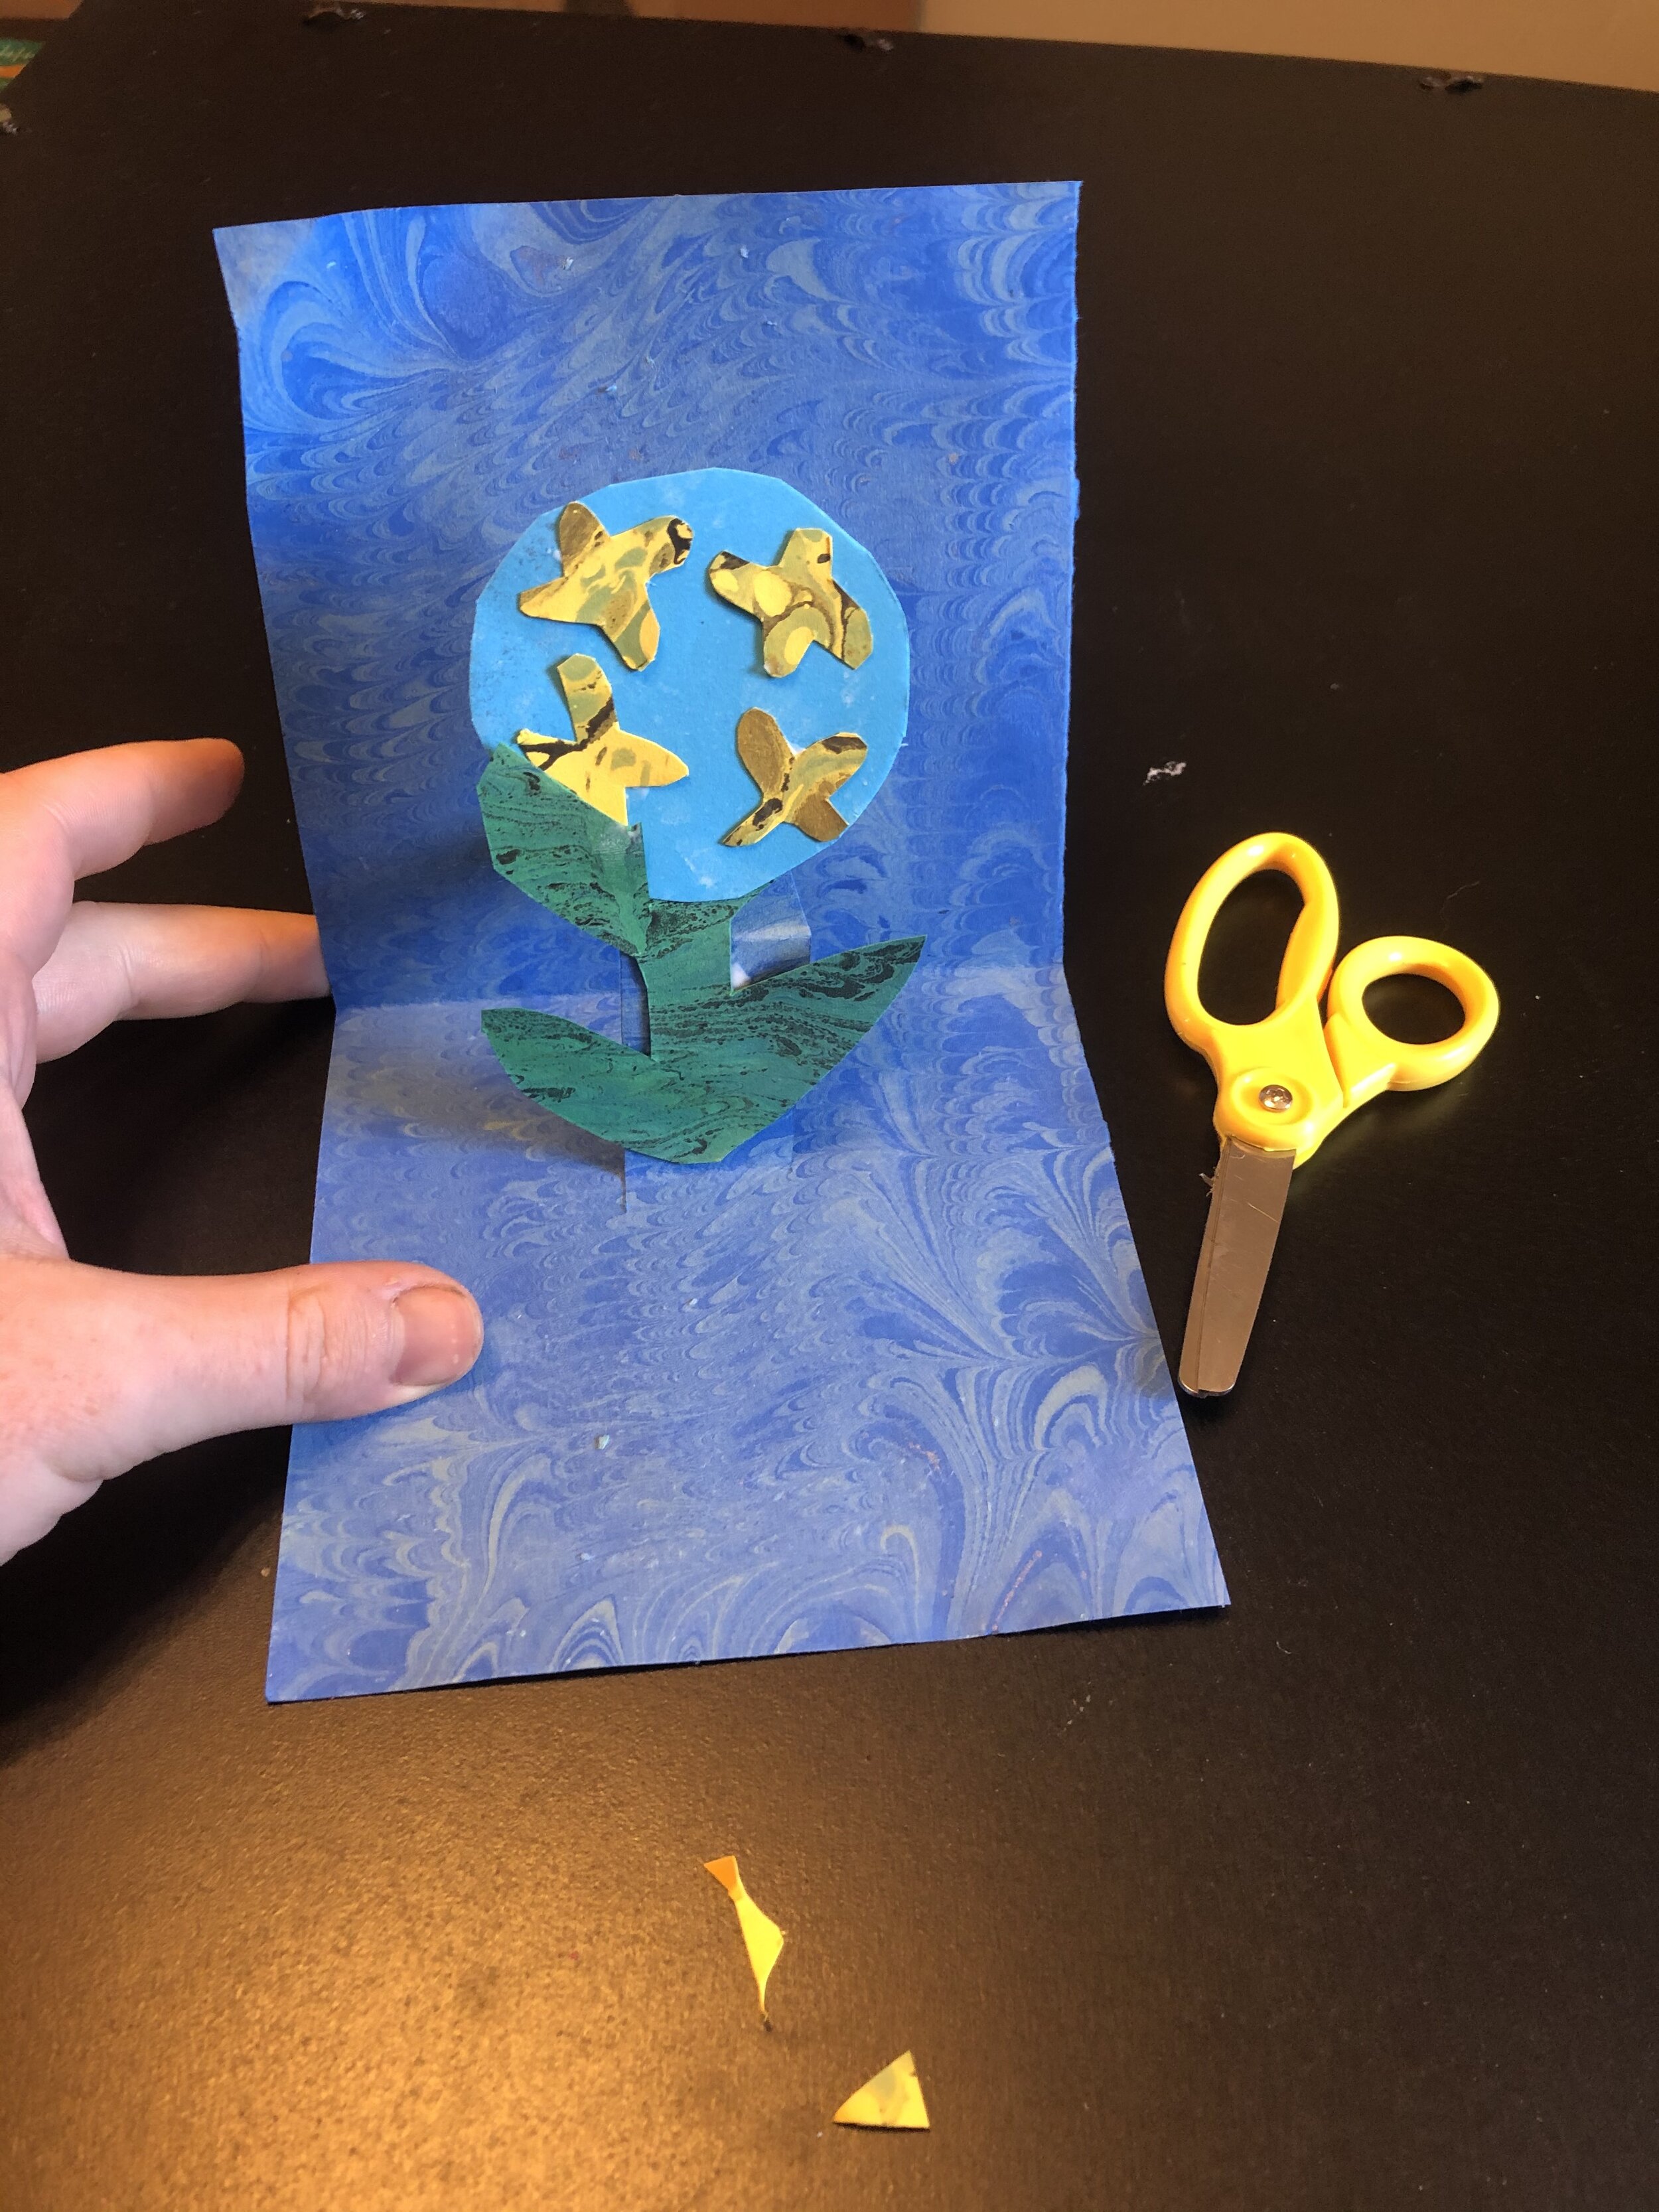
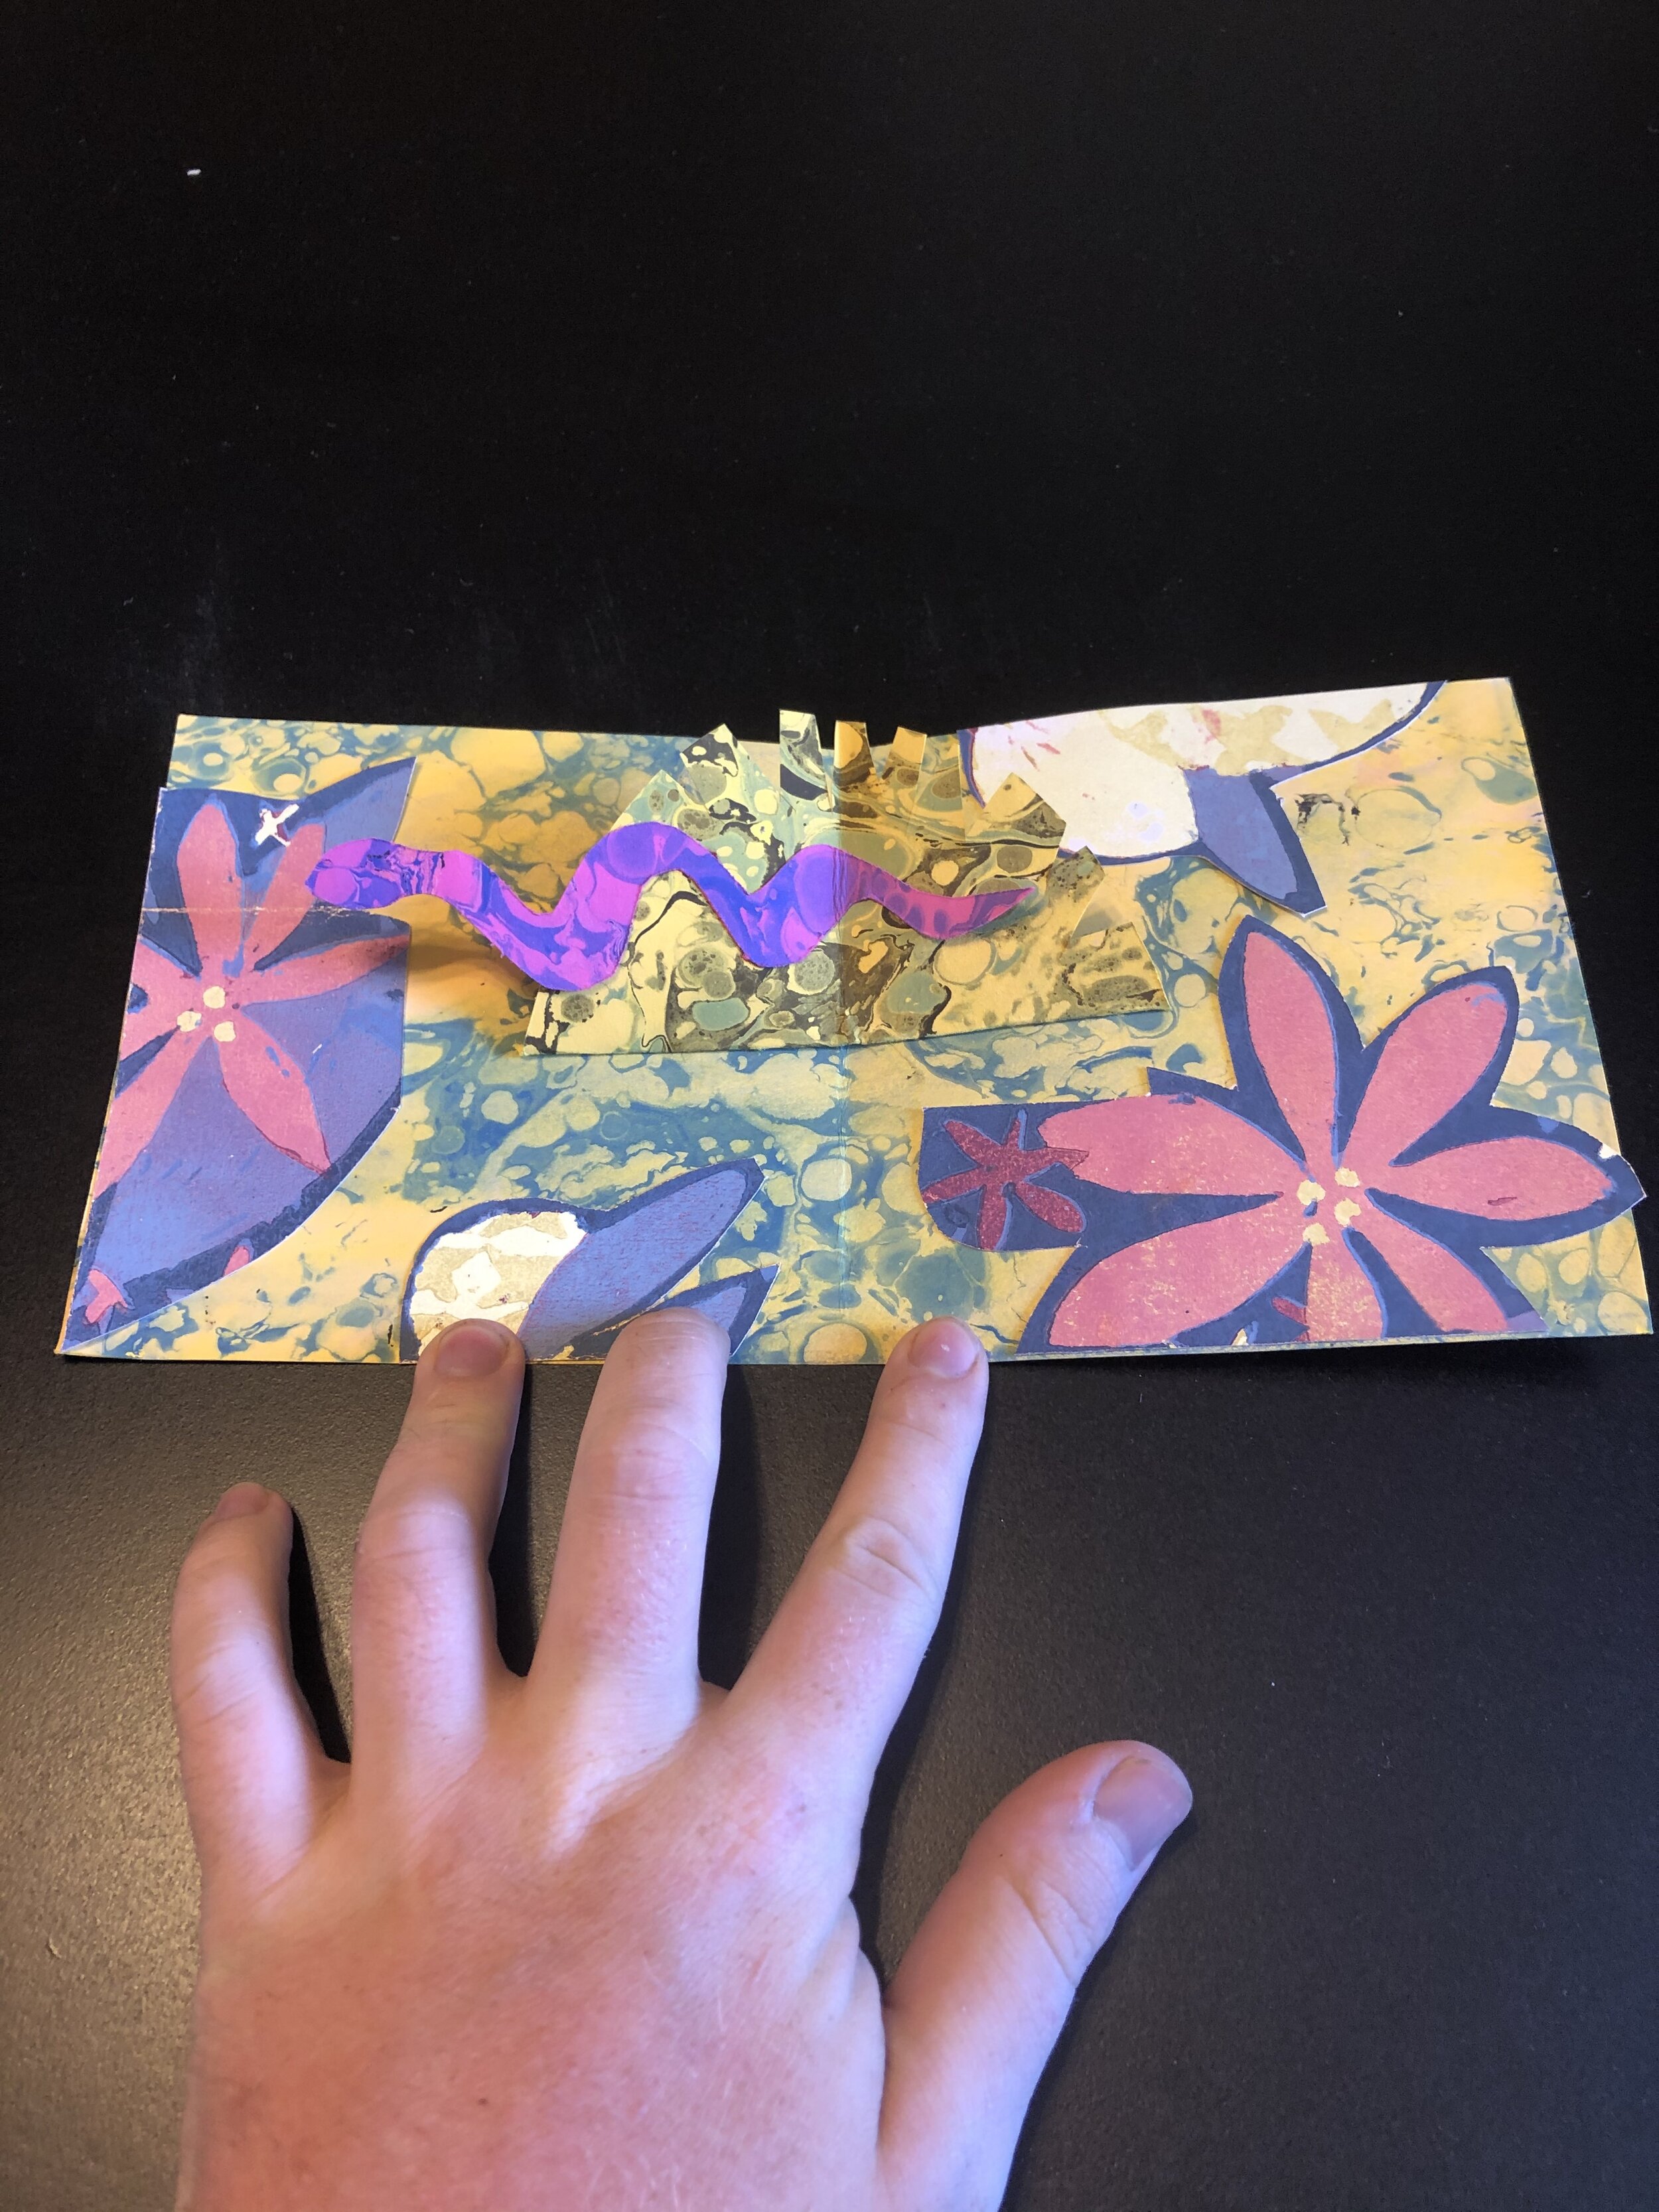
Pop-Up Steps:
Cut a piece of cardstock to the desired size.
Next, fold the card stock in half. Cut two parallel slits on the folded side of the paper, about one inch apart and about one inch long. I’d encourage you to play around with the length of these cuts.
Next, fold the tab up and crease it.
Open up your card. And then pop the paper toward the inside of the card.
Cut a piece of colorful construction paper, the same size or slightly bigger than the card stock. Glue the card stock to the construction paper. Be sure that you don’t glue the “pop-up” section down.
Add elements to pop-up! If the pop-up objects are too tall, they’ll poke out of the card when it closes. Decorate the cards with crayons, markers, or colored pencils. When the card is done, glue the pop-up piece in place and let it dry for about an hour.
For a more advanced project, learn how to make a tunnel book. These are great ways for older children to present the plot of a story they read or to create their own story.
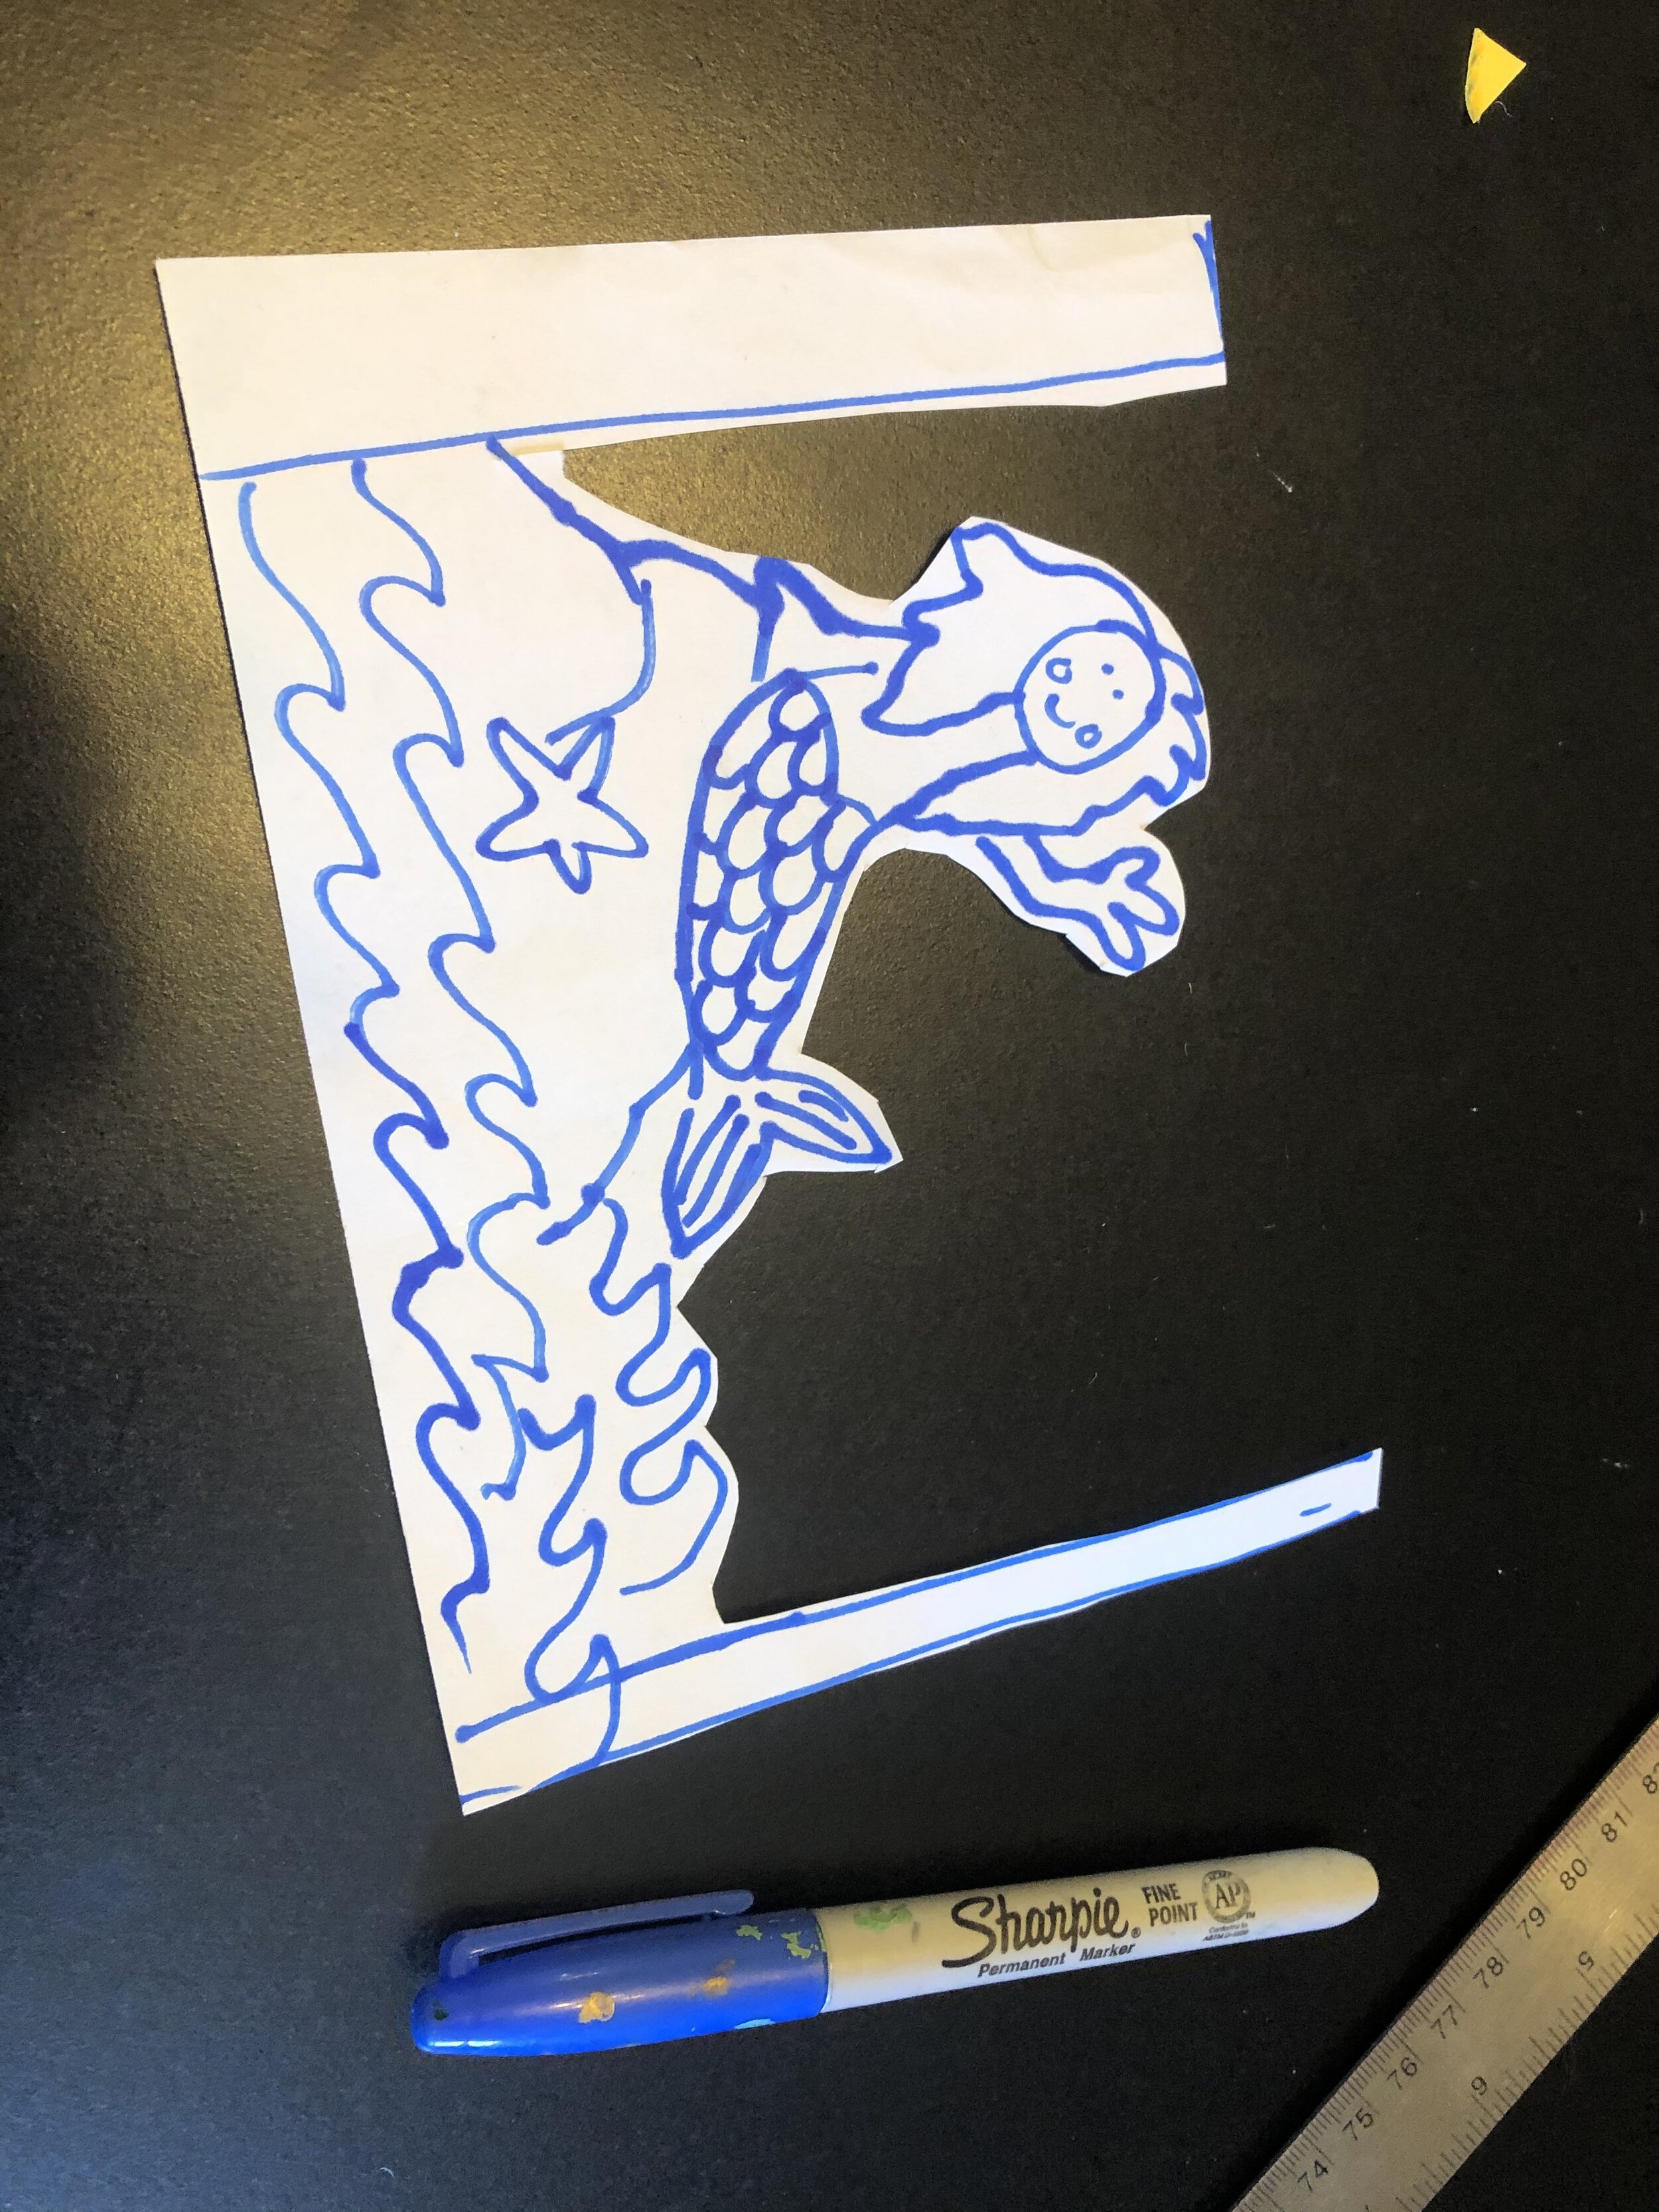
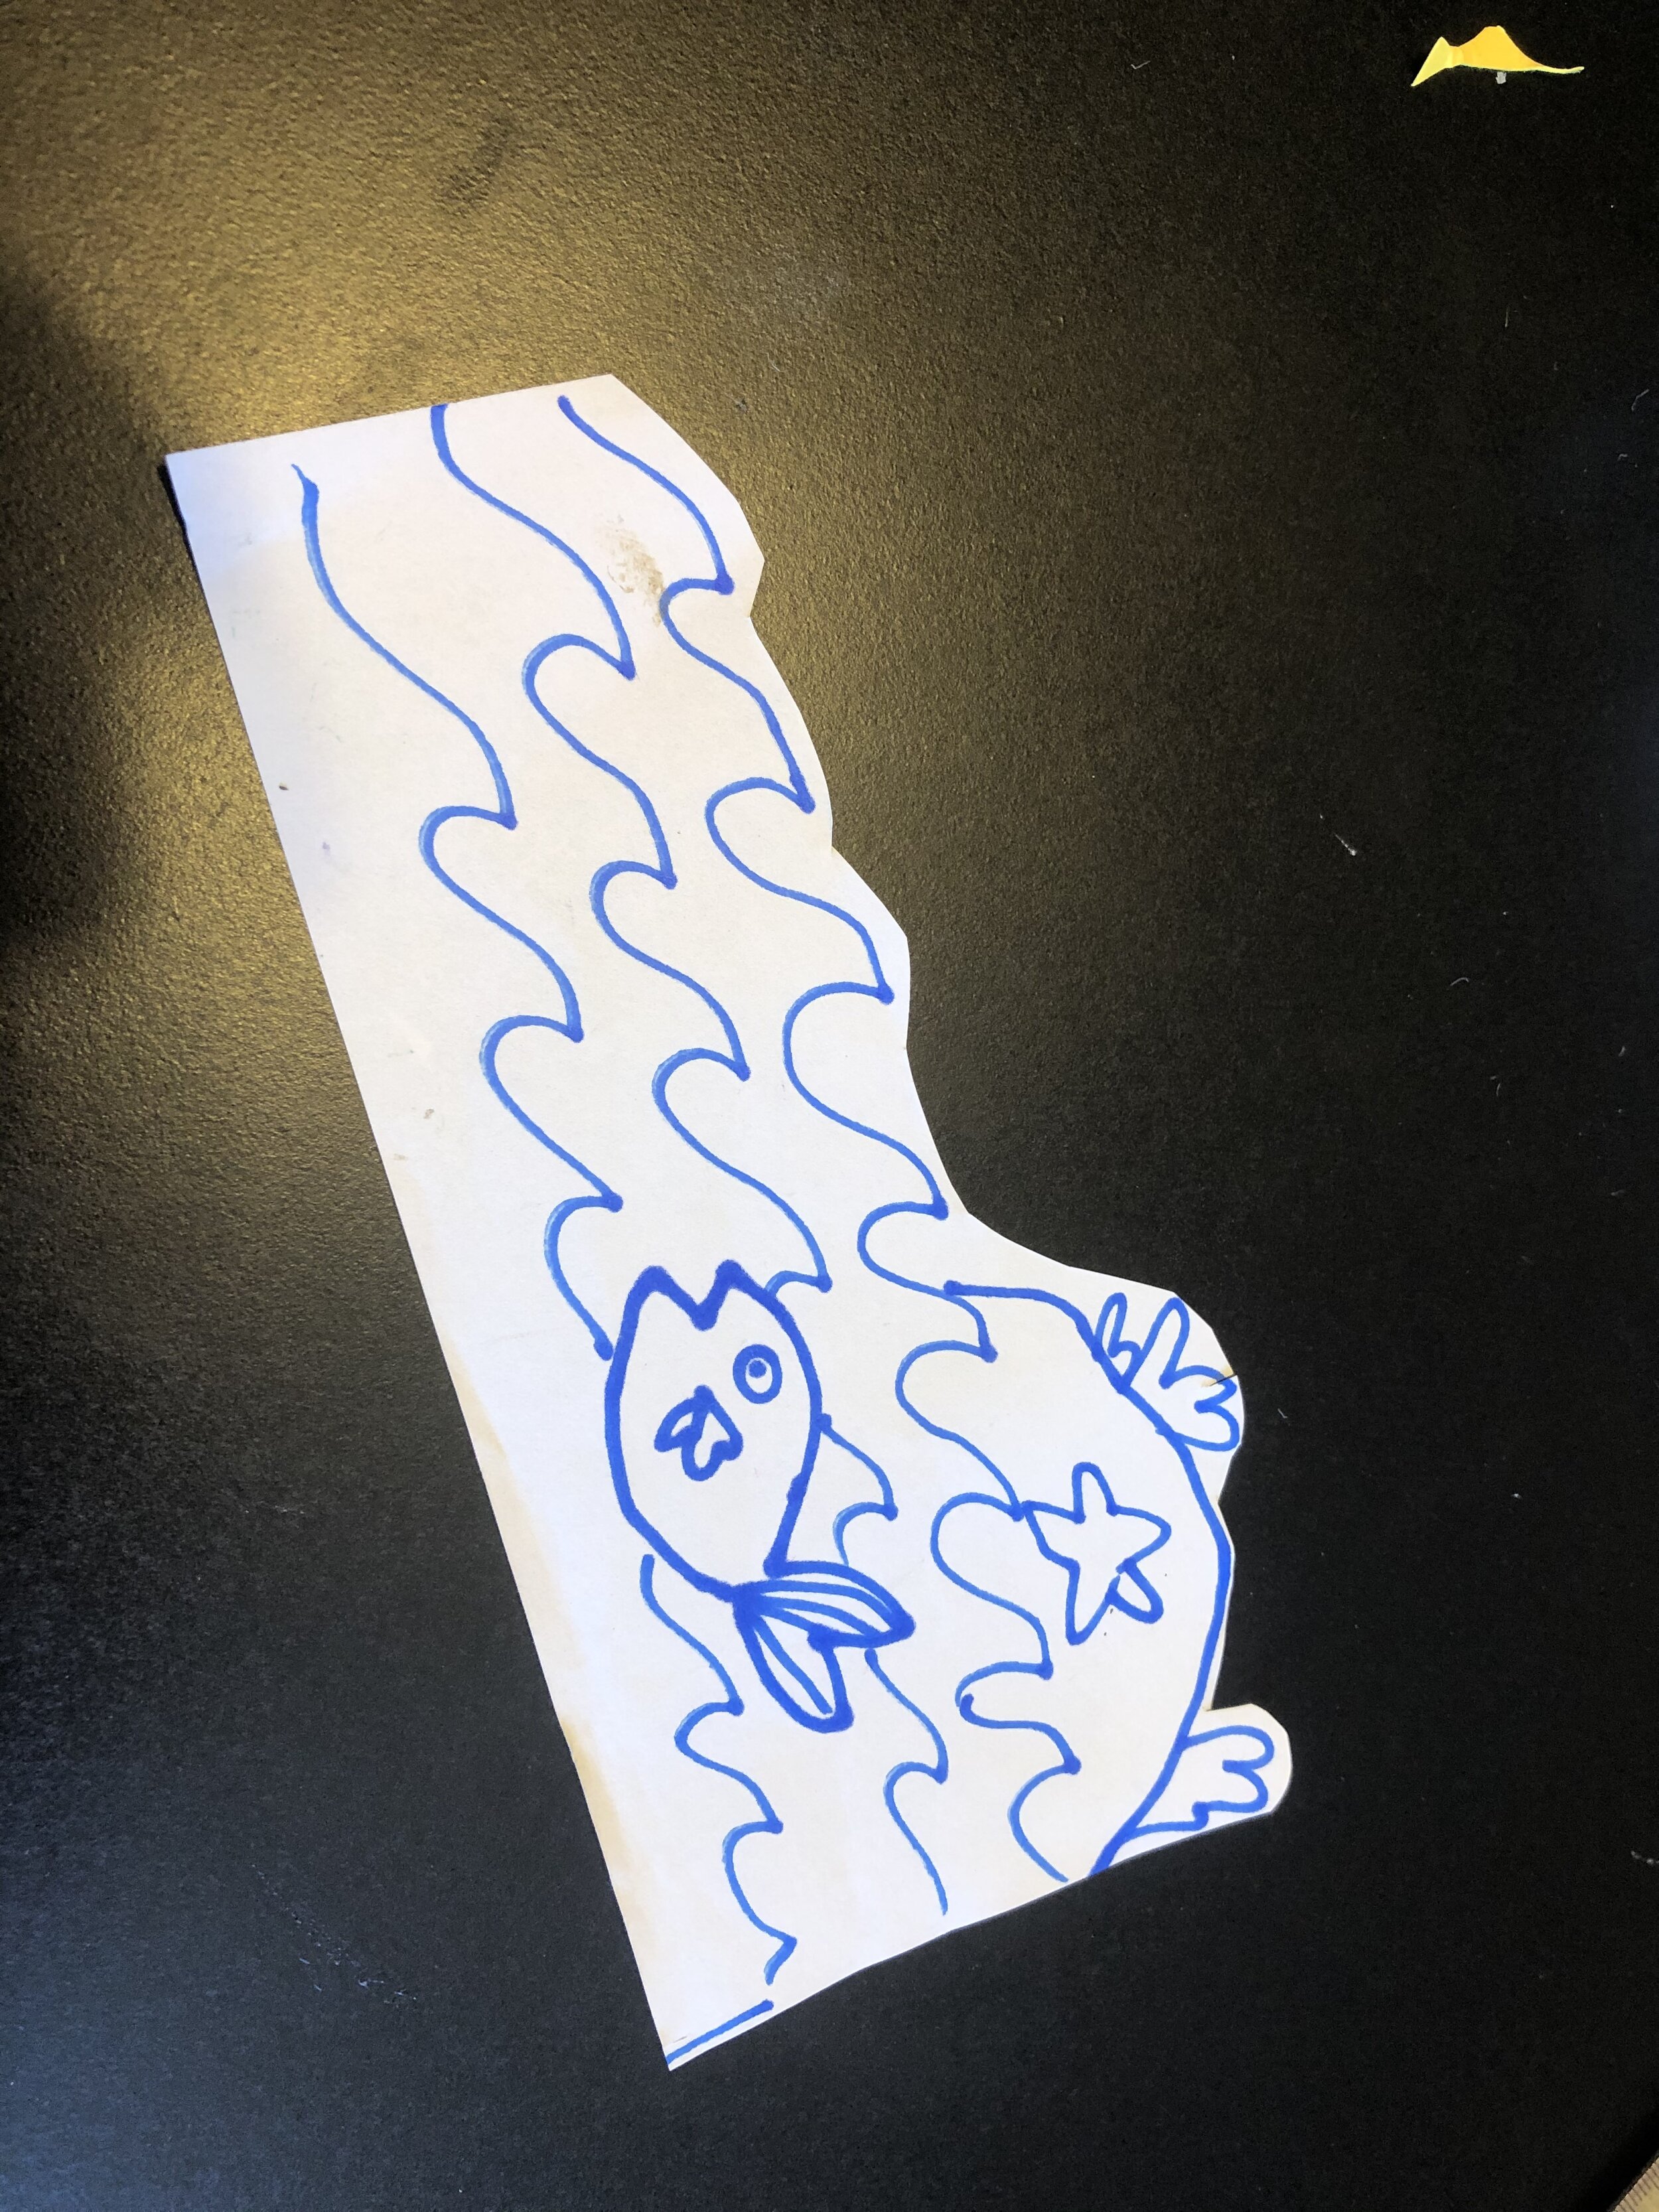
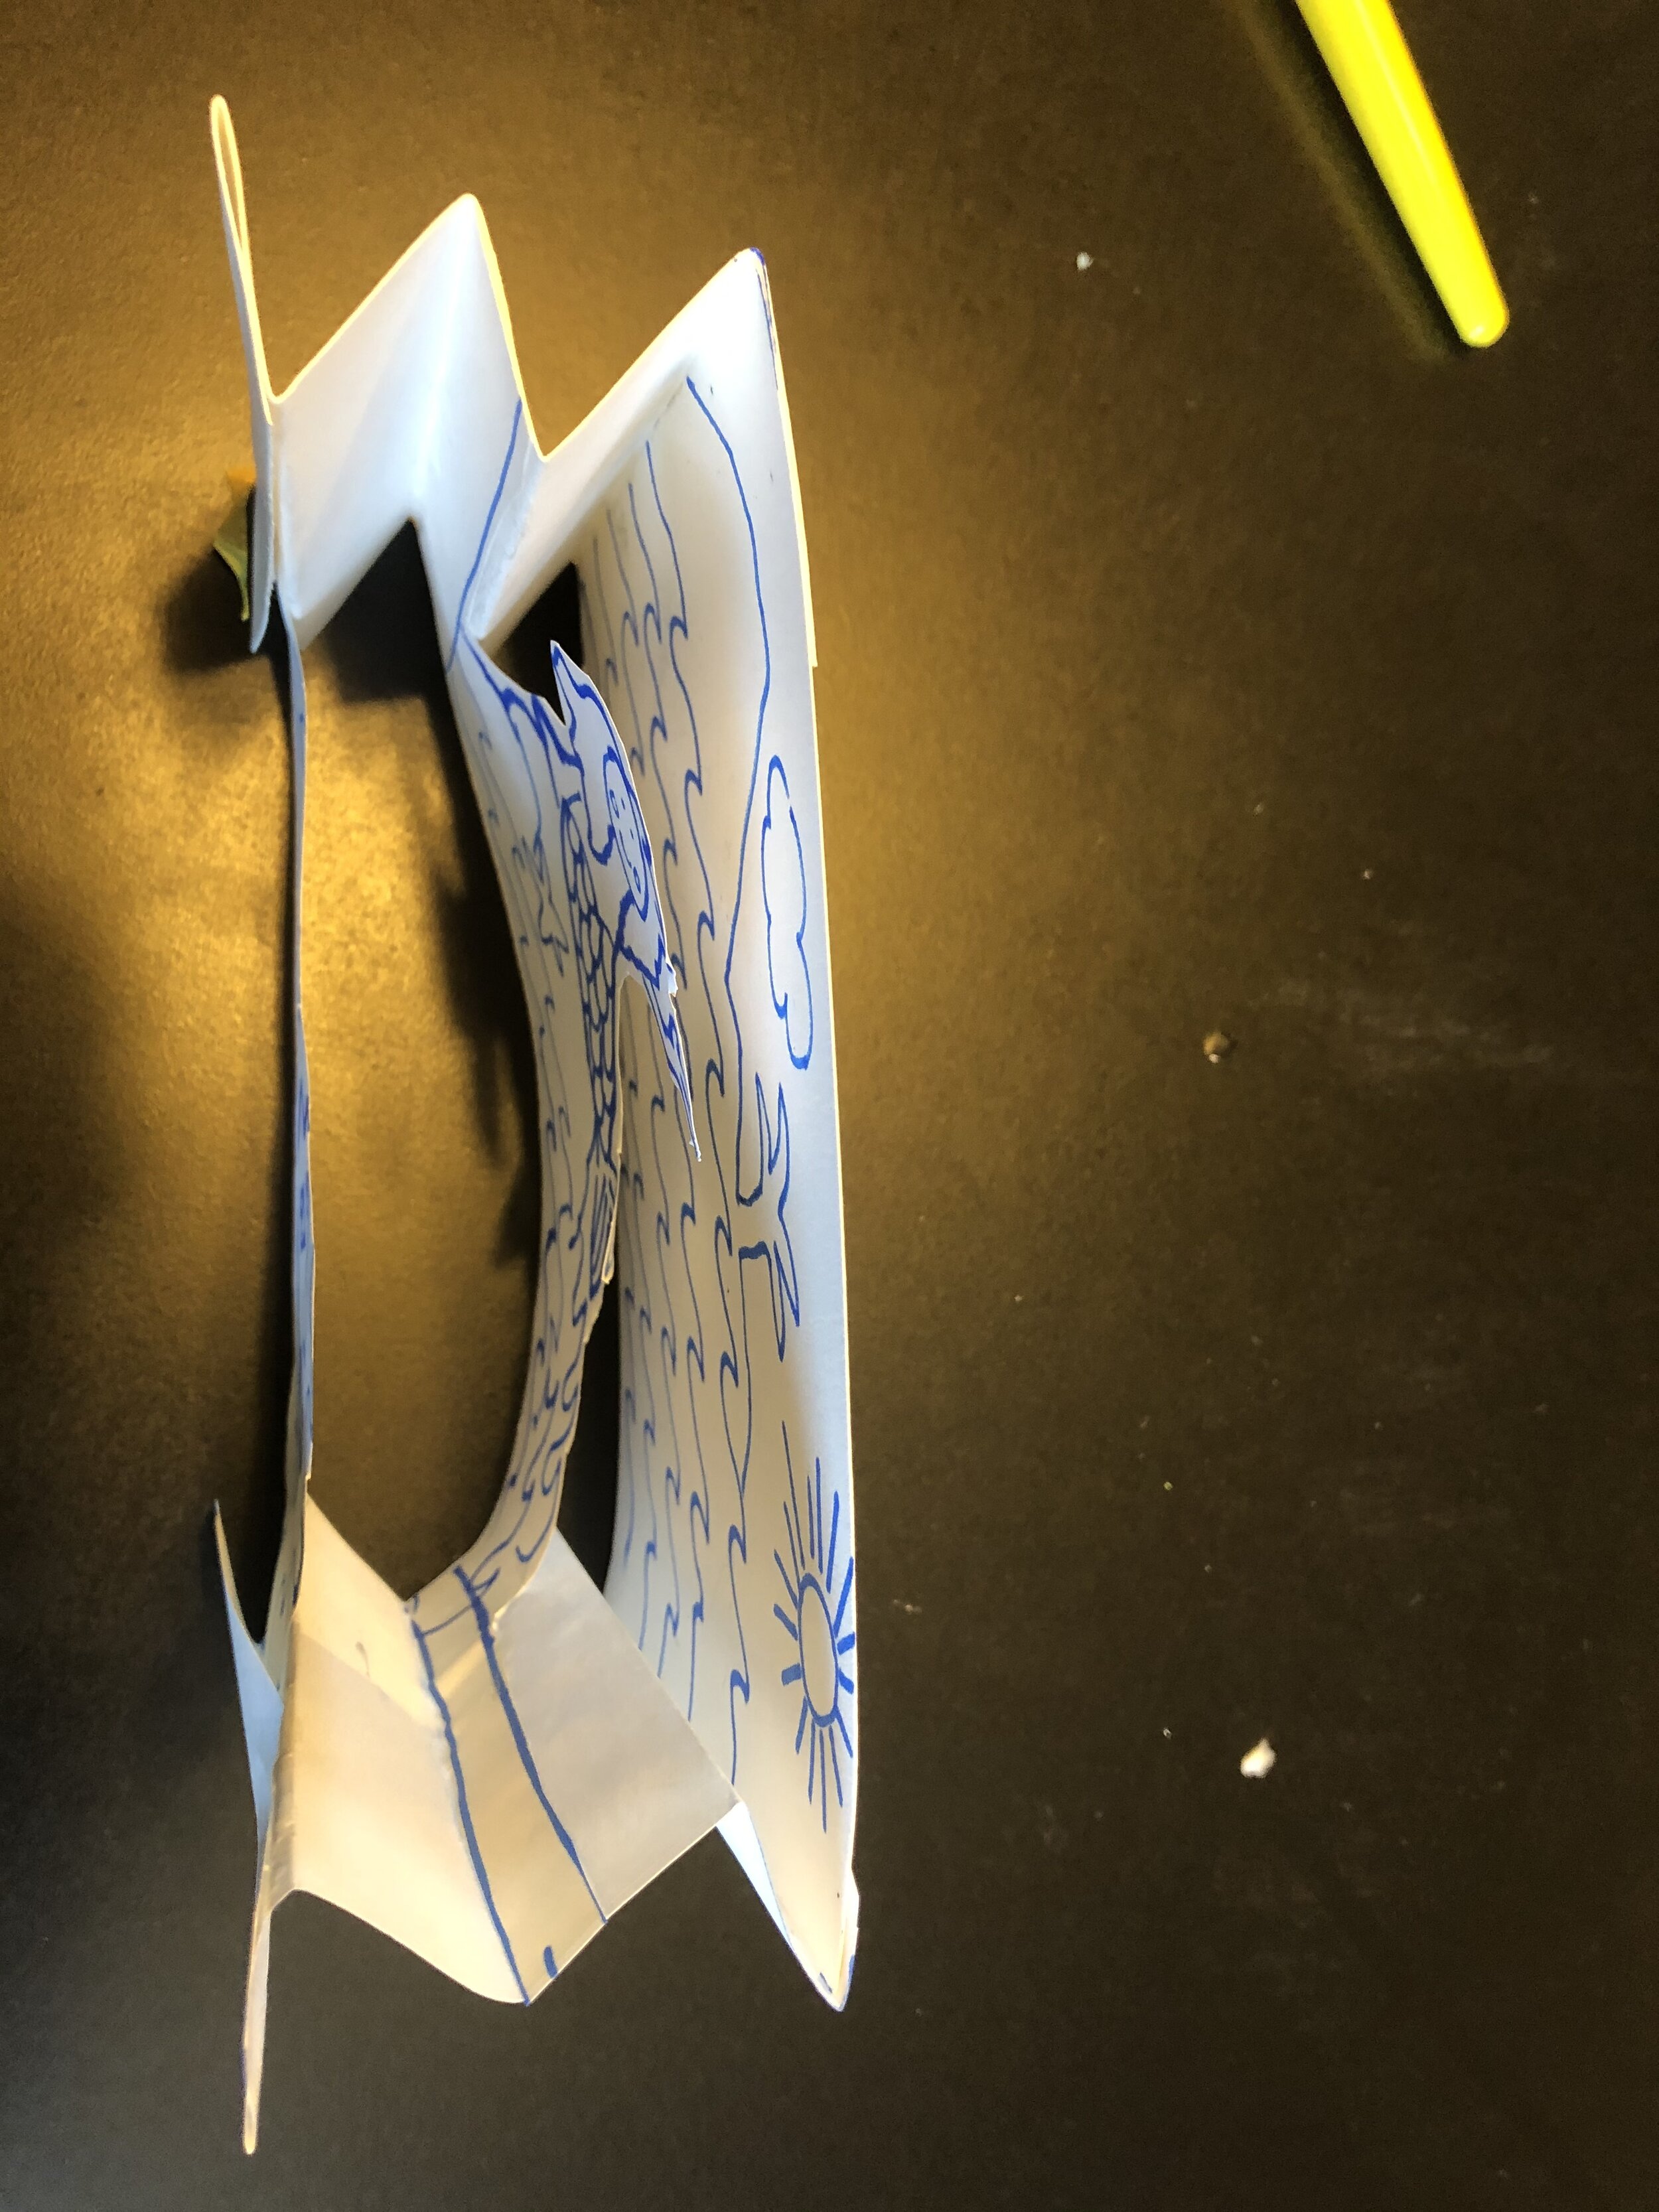
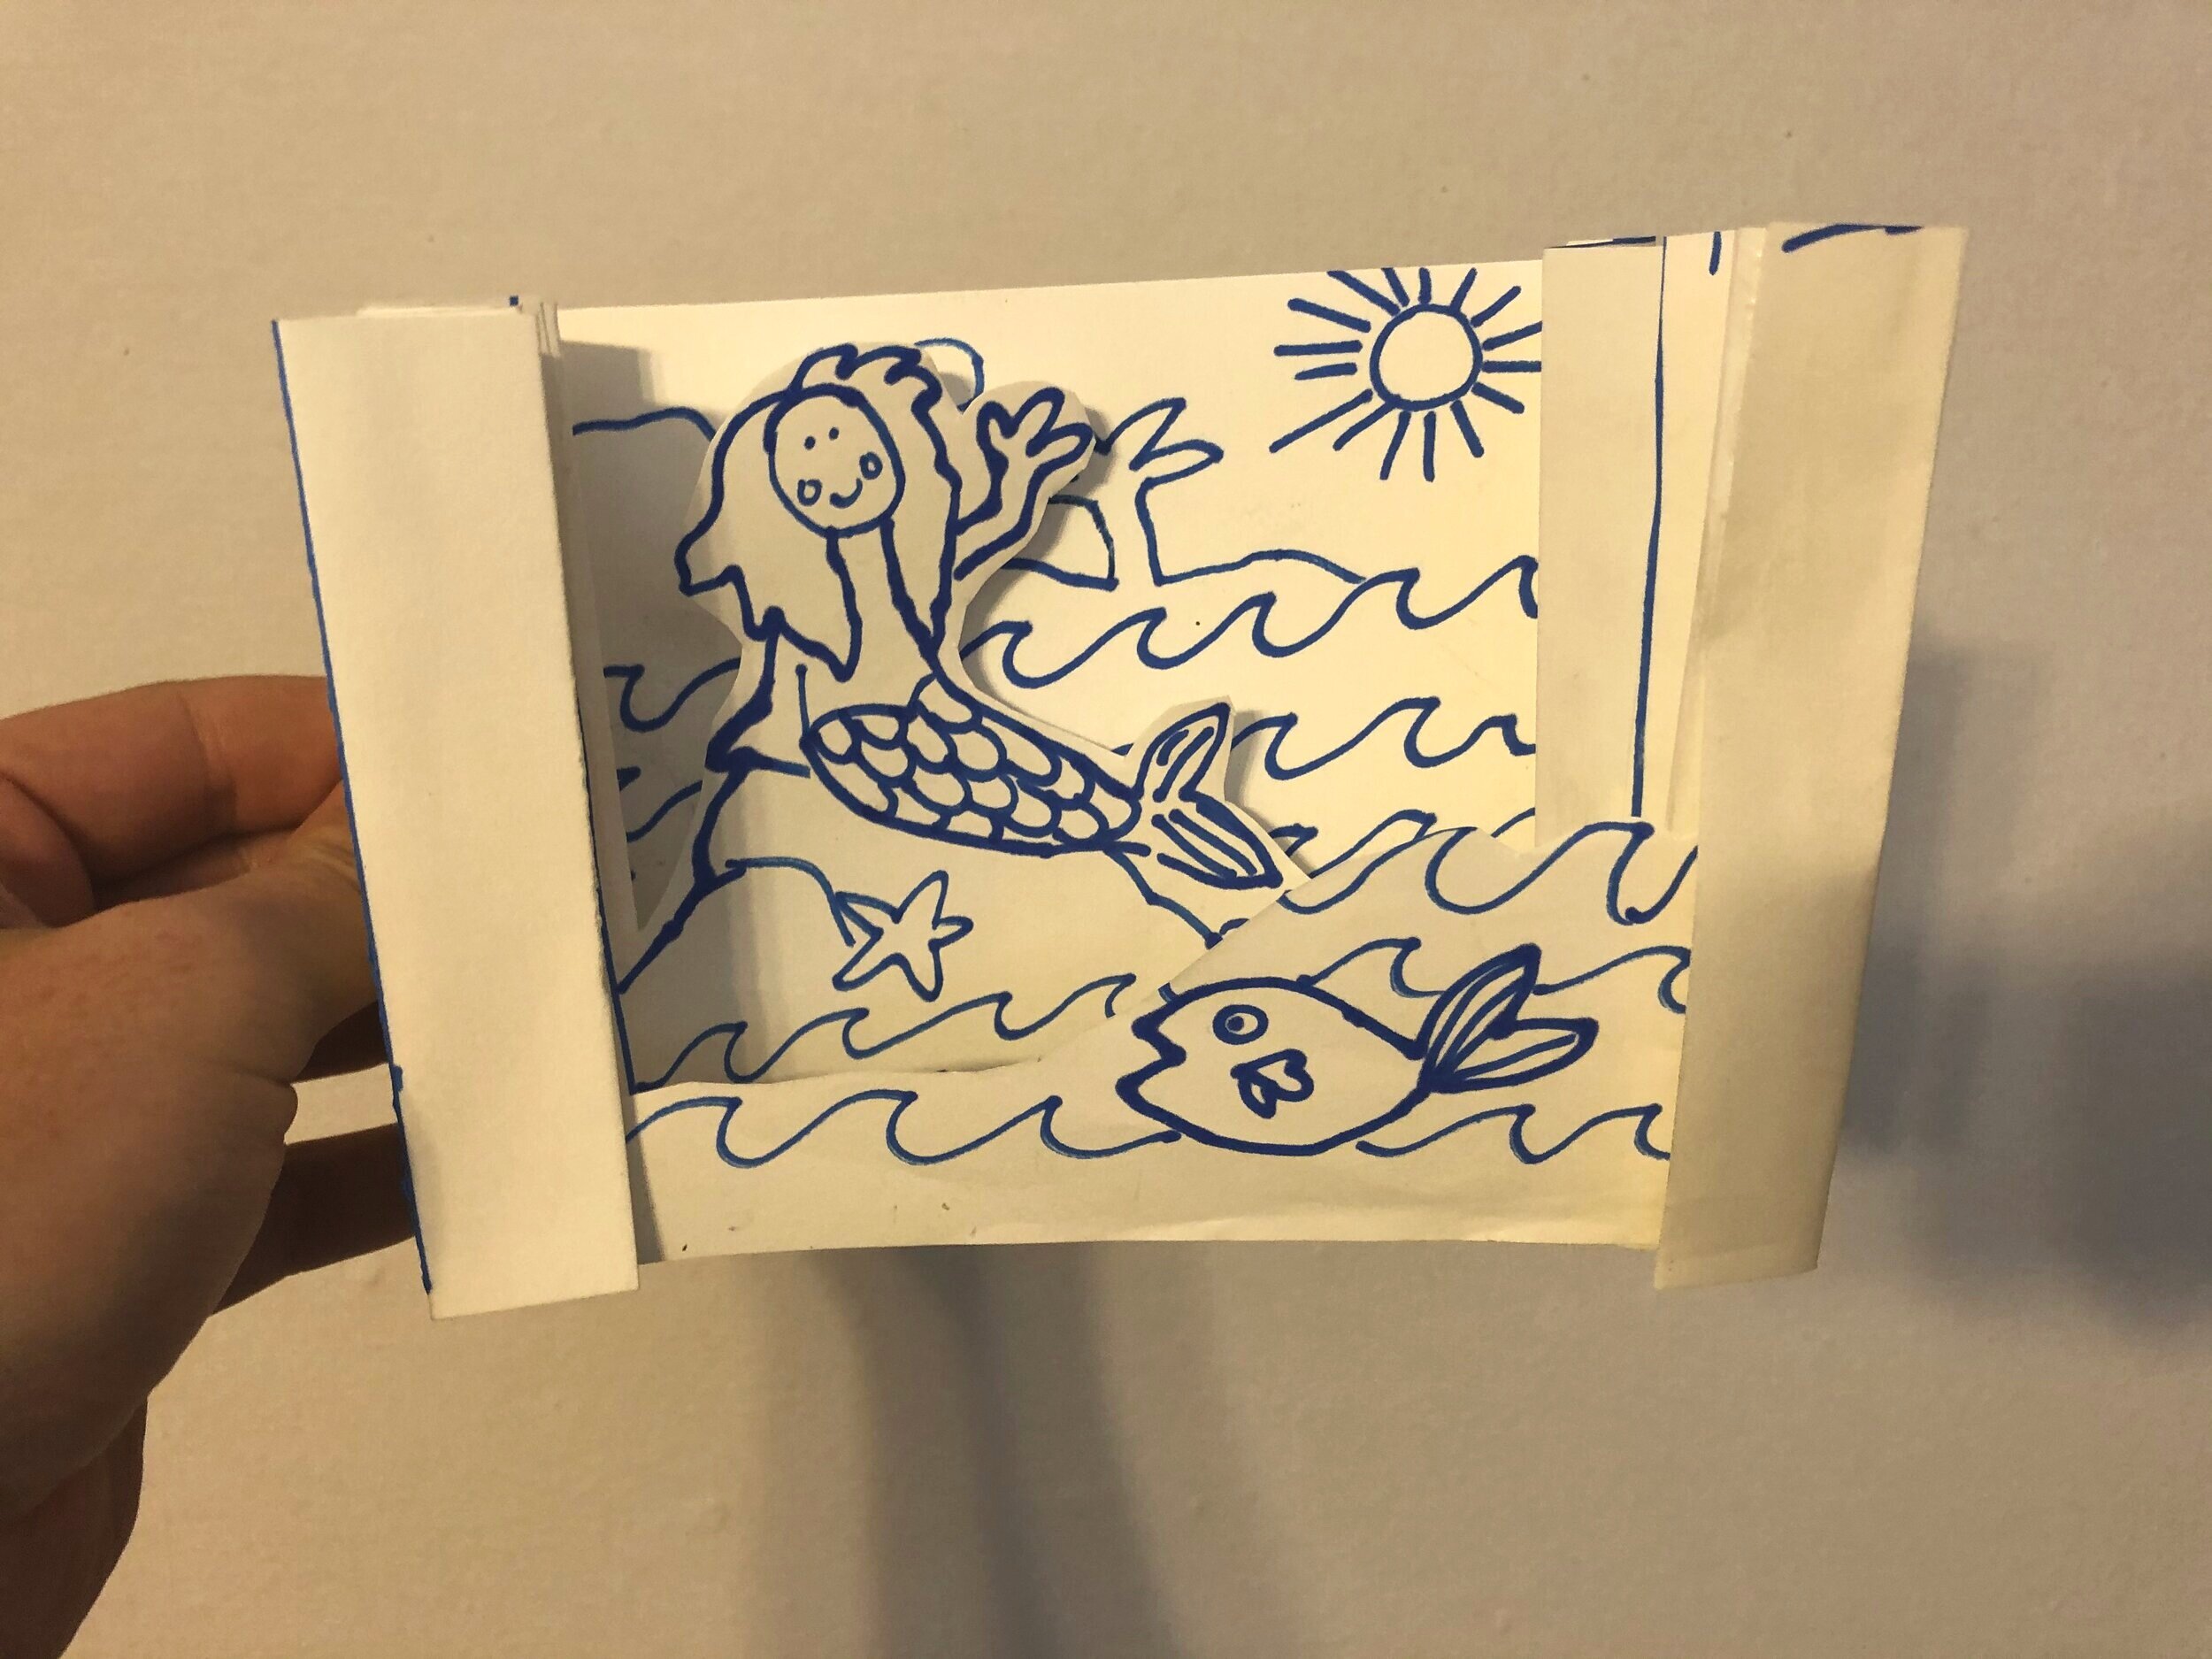
Tunnel Book Steps:
Gather your supplies. To make a simple three-paged tunnel book, you will need three pieces of paper for the image, two pieces of paper for the spine, a pencil, a ruler, an exacto knife and/or a pair of scissors.
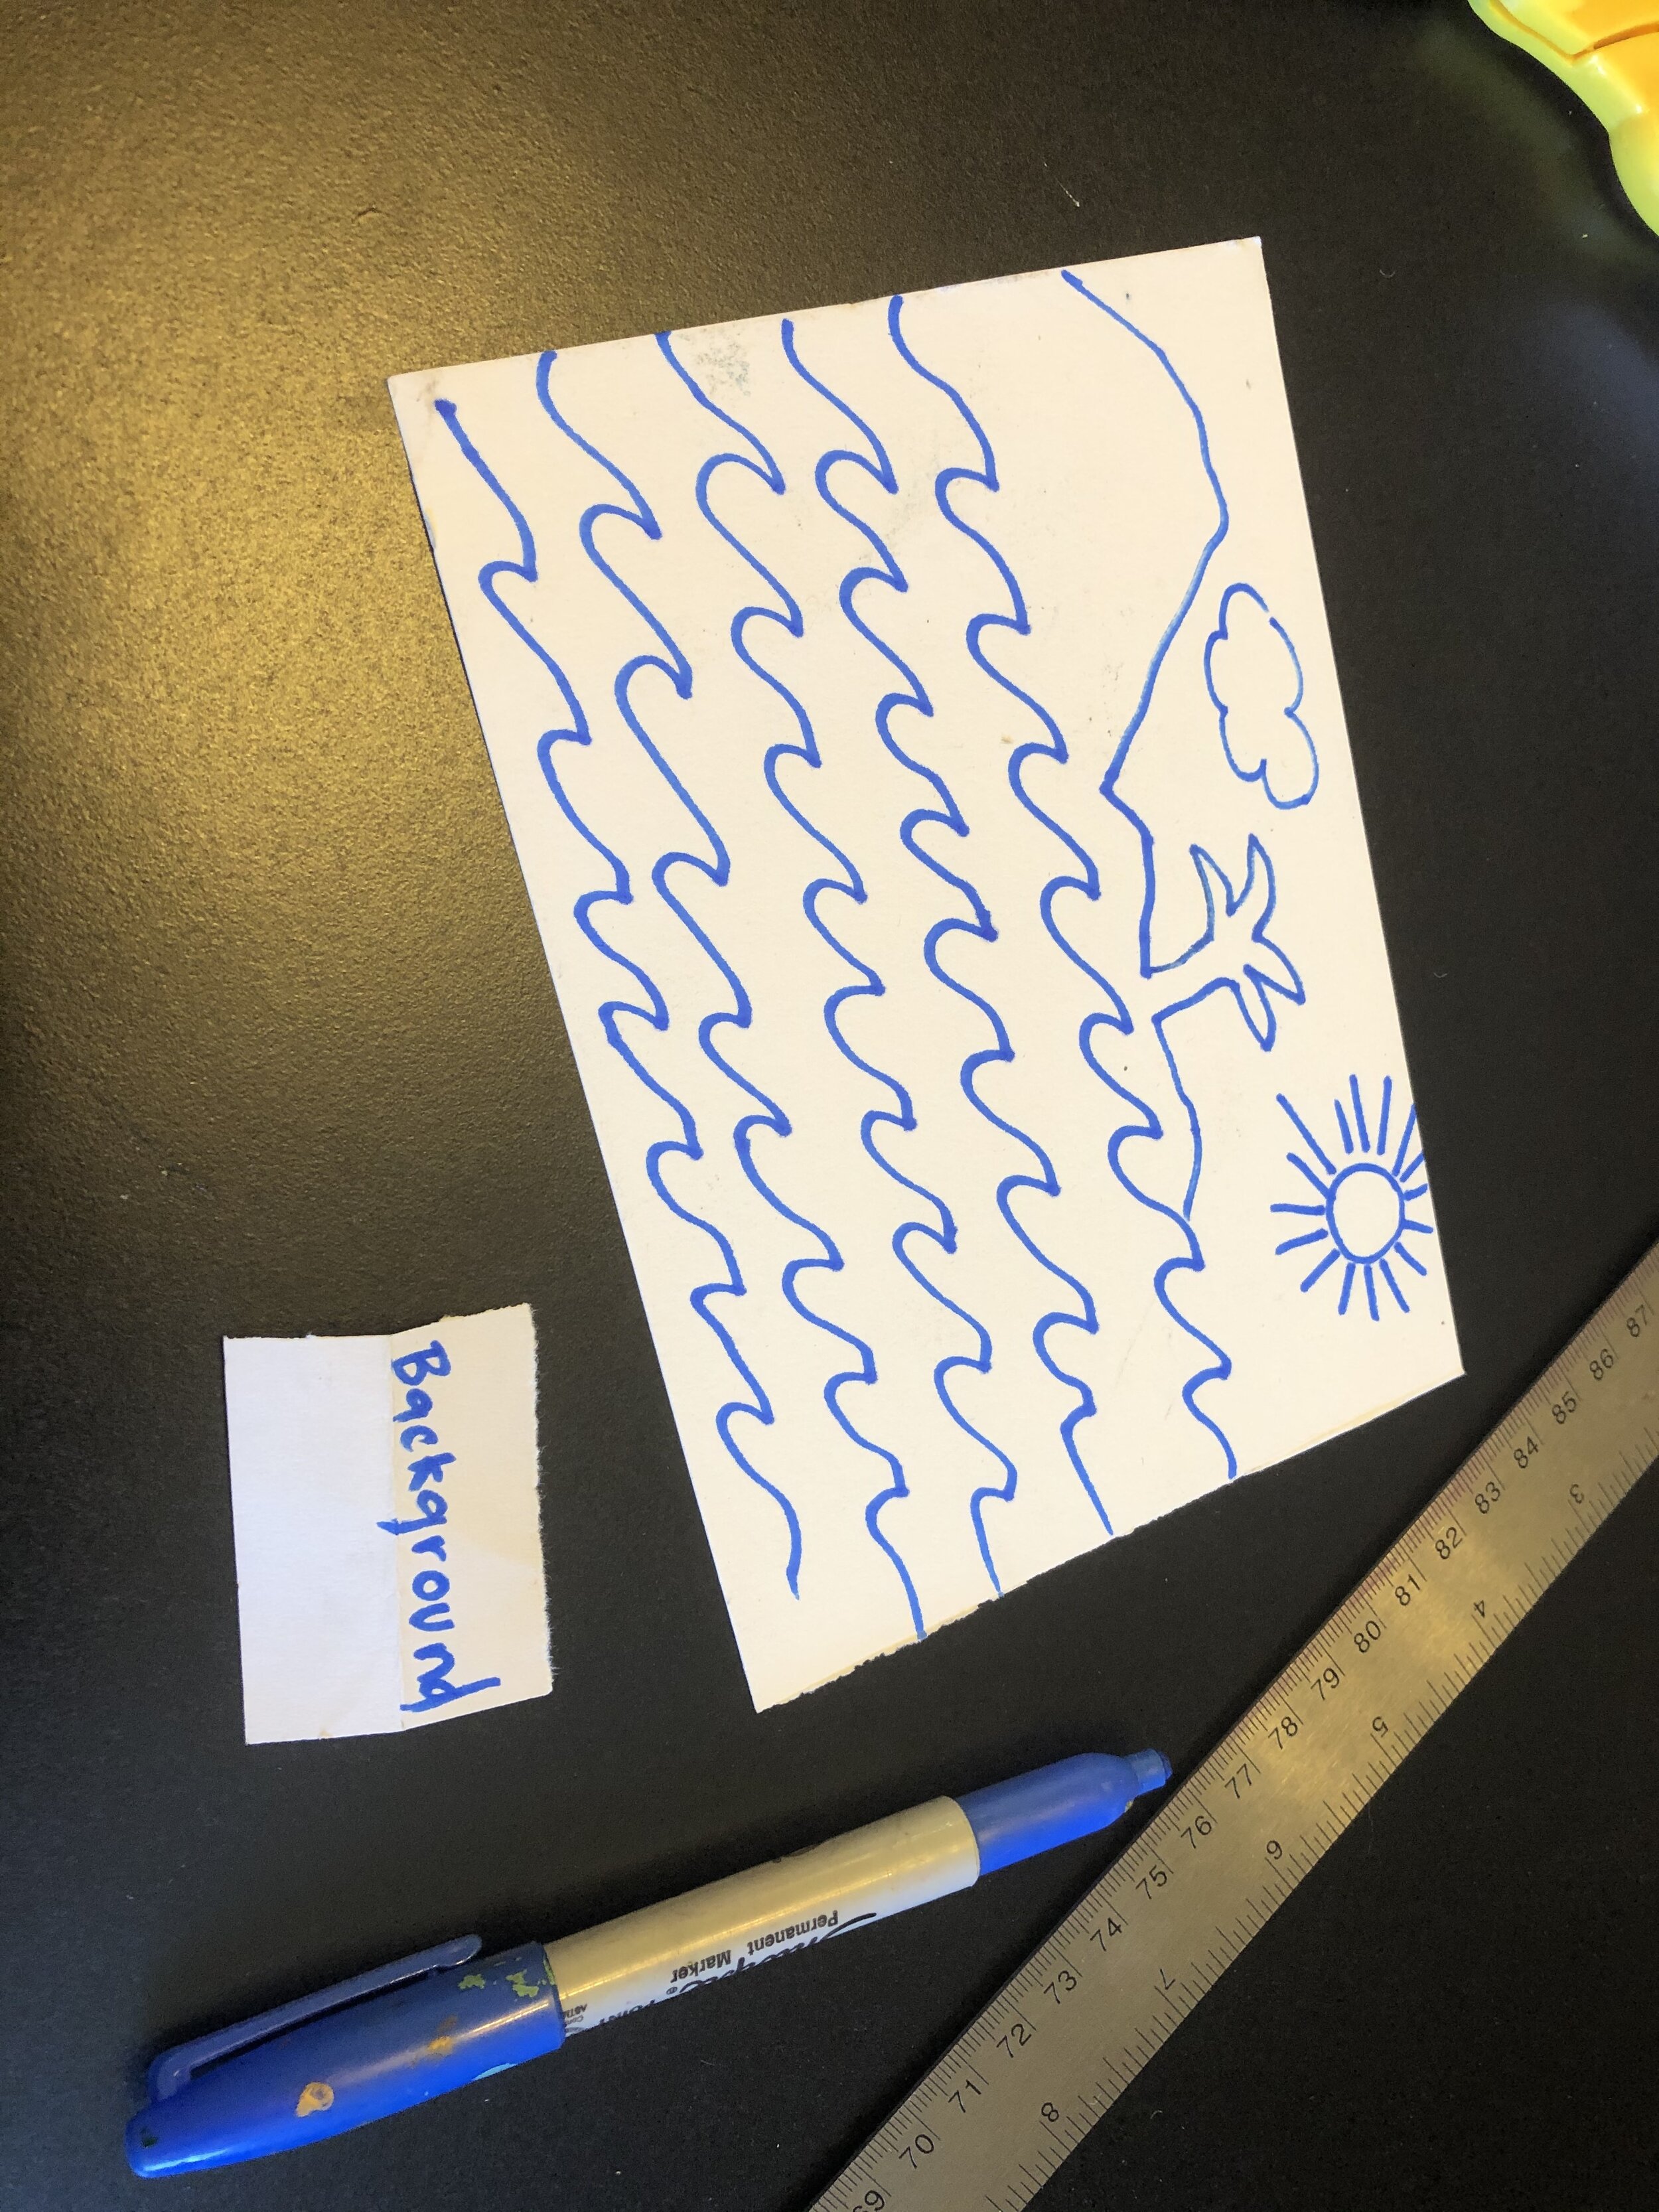
Design your pages for the book—Think about how to create ‘windows’ that the viewer can navigate through. Each page should reveal a part of the background.
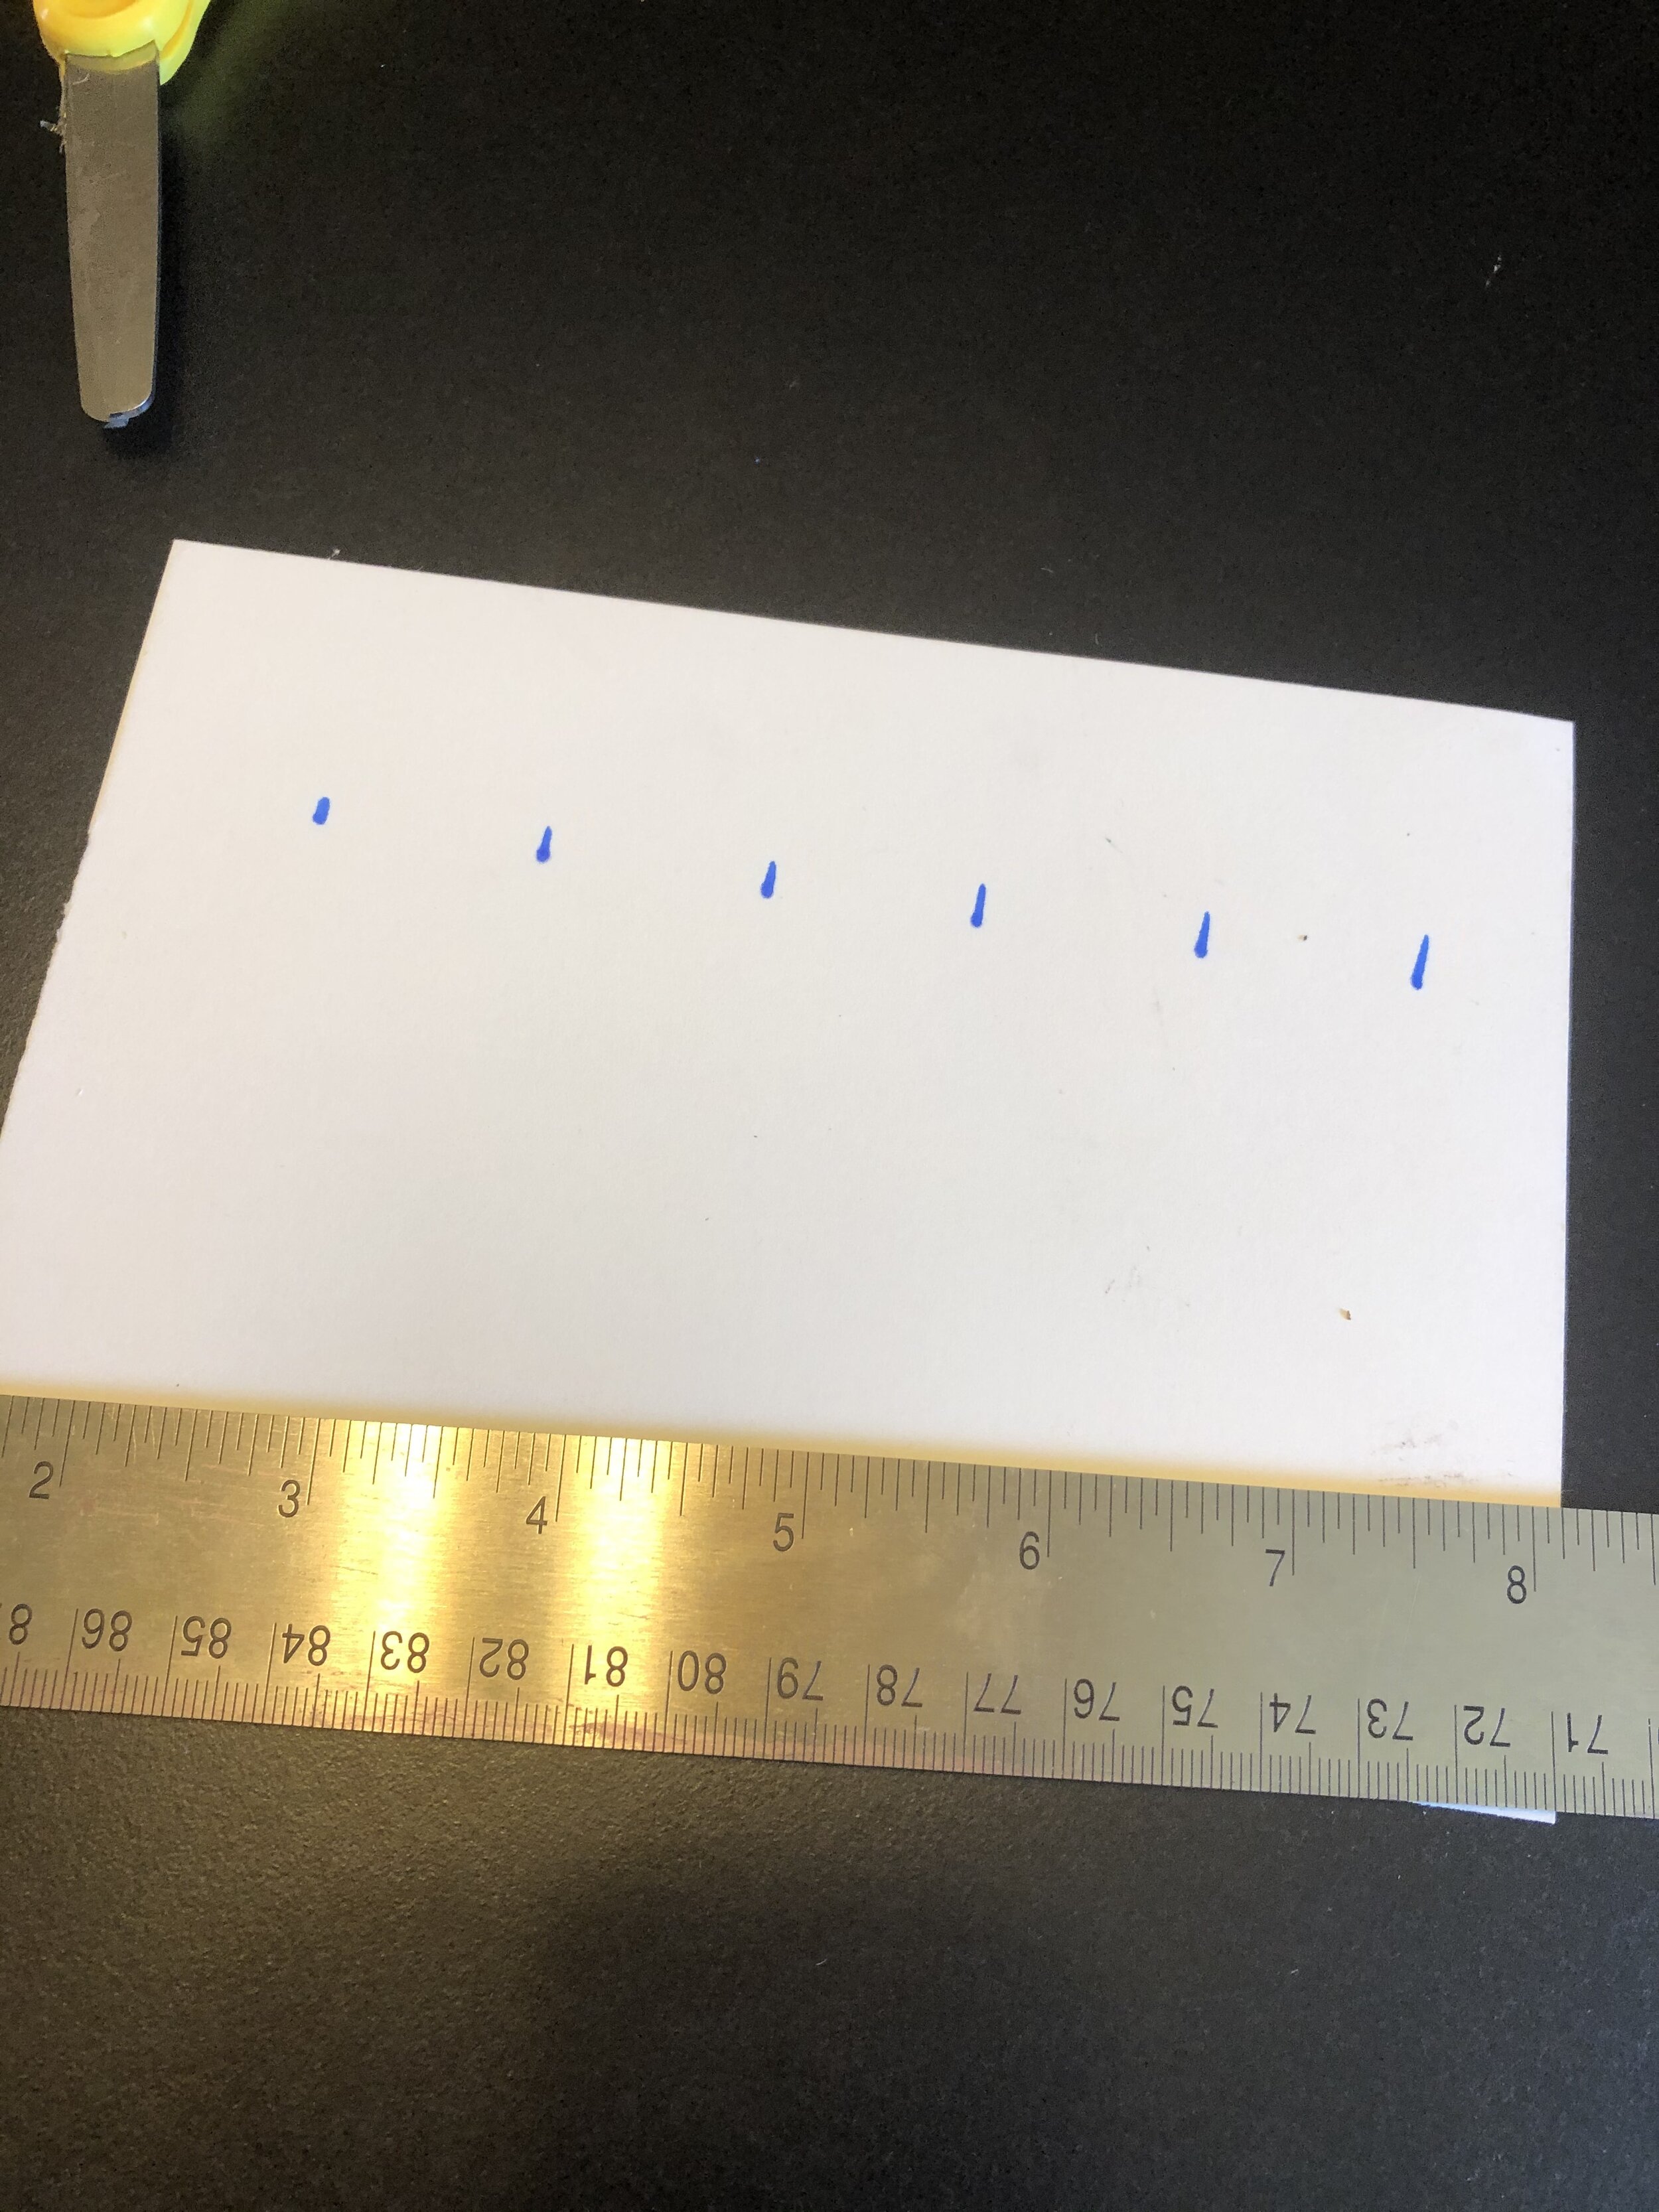
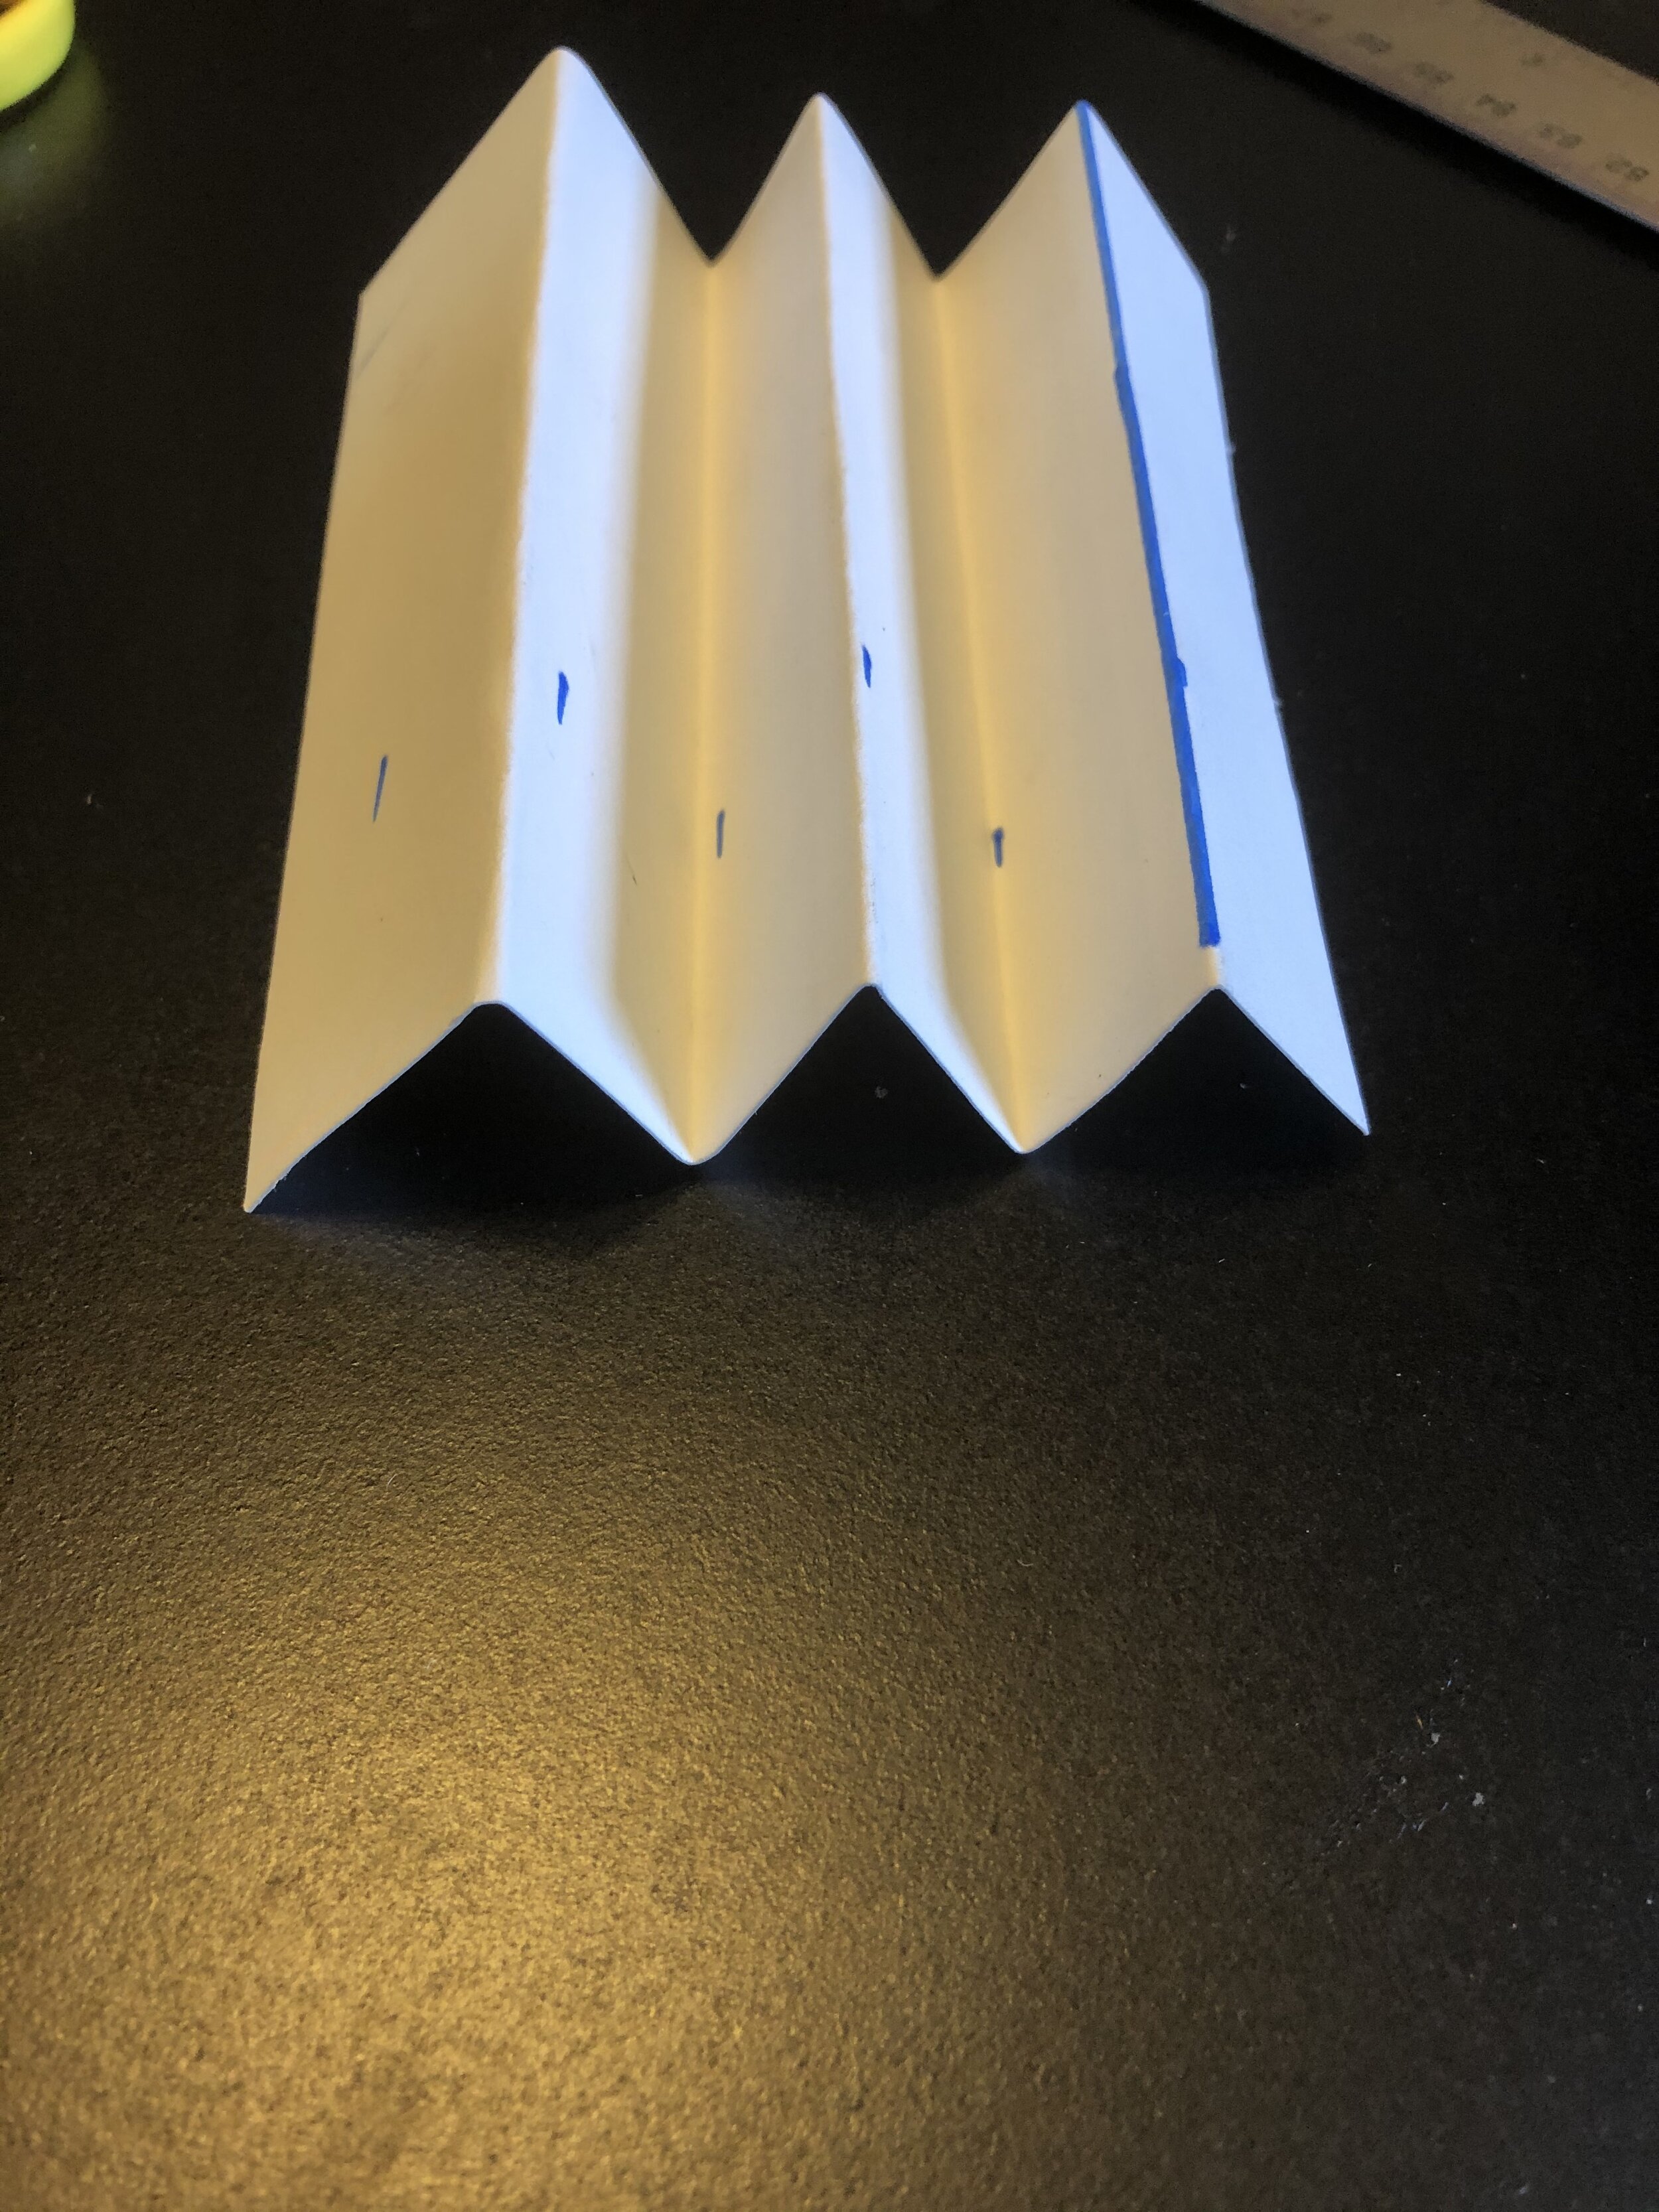
Take piece of paper and a ruler and in a horizontal format, make inch marks across the top and bottom. Now connect the lines. At each line, you will fold the paper as if you were making a paper fan—This is called an accordion fold.
Now look at your accordion folds. You can see that you have folds going up and folds going down. Folds that go up are called mountains and folds that go down are called valleys. Remember this.
Let’s assemble. Place the back page in two of the mountain folds, one on each side. Make sure that the creases are on the outsides, and glue the page to the back of the accordion. Continue to add pages to the next mountain folds until you reach the front of the book. You can skip an mountain fold to create more depth, or use a strip of paper to create a ‘floating object.
Share what you created
Tag us with a photo @lsumoa on social media or email us a photo below!


